From Nothing to Something: Desolate Cosmos
What
This is a write-up of lessons learned from Desolate Cosmos. It’s aimed towards people who are beginner-intermediate in Unreal and looking to improve their projects.
Desolate Cosmos is a small interactive tech demo I made to push my skills further in Unreal. It’s a short interactive narrative of an engineer arriving to a far out space station that society lost contact with. Much of the demo is exploration themed, with a number of robot characters for the player to talk to in hopes of finding out what happened.
Why
Desolate Cosmos is a personal project I treated like a game jam in order to learn other areas of UE4. I have worked with Unreal on and off for a few years, but there was a variety of skills that teammates usually covered instead. This project focused on a lot of the stuff I didn’t know and pushing myself forward.
The tech demo included skills like
Where
https://gamejolt.com/games/desolate-cosmos/346830
https://forums.unrealengine.com/community/released-projects/1497120-desolate-cosmos-demo
Table of Contents
Lighting, Reflections and Shadows 10
Video Settings - Fullscreen Borderless 31
Video Settings - Graphics Quality 33
Optimization View Modes - Light Complexity 48
Optimization View Modes - Lightmap Density 49
Optimization View Modes - Shader Complexity & Quads 50
My goal for this project was to learn and I knew I wanted to make something space-related. With that in mind, I picked up a number of assets during the last Unreal Marketplace sale. I restricted myself to assets that were on sale and I could use for more than just this project.
That included the following:
3d Assets:
Music:
Sound Effects:
Particles:
Given the limited number of assets, I had to get creative to fill in the blanks. It’s unlikely to find every asset I want in the Unreal Marketplace. It’s just unrealistic, so I made a number of models, textures and materials myself.
Many assets are reused with different textures and scales to have variety without the user necessarily realizing it. Many of the floors and wedges are made this way. Other models are just the same models with doctored textures to decrease repetition. For example, in some cases I added a sand texture over existing textures for a worn look
For the skybox, I used Spacescape, which seemed fitting.
http://alexcpeterson.com/spacescape/
Once I got the desired outcome, I exported the DDS file and did some hand editing in photoshop using a DDS plugin. The hand editing was just to add some variation (brightening certain areas, erasing others, adding filters to some areas, etc).
I also created a separate star texture in photoshop.
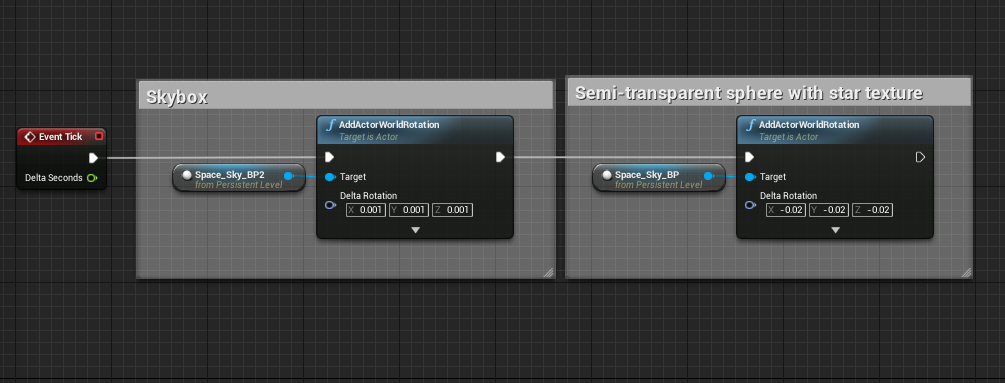
I knew I wanted to get a bit of a parallax feel, so the main skybox uses the DDS file. Then there’s a sphere around the map with the star texture applied as a translucent material (shadows disabled because it wouldn’t make sense and takes extra processing)
Both the skybox and sphere are rotated slowly but at different rates to create a parallax effect when the user looks outside.
Event tick in level blueprint rotate skies at different rates.
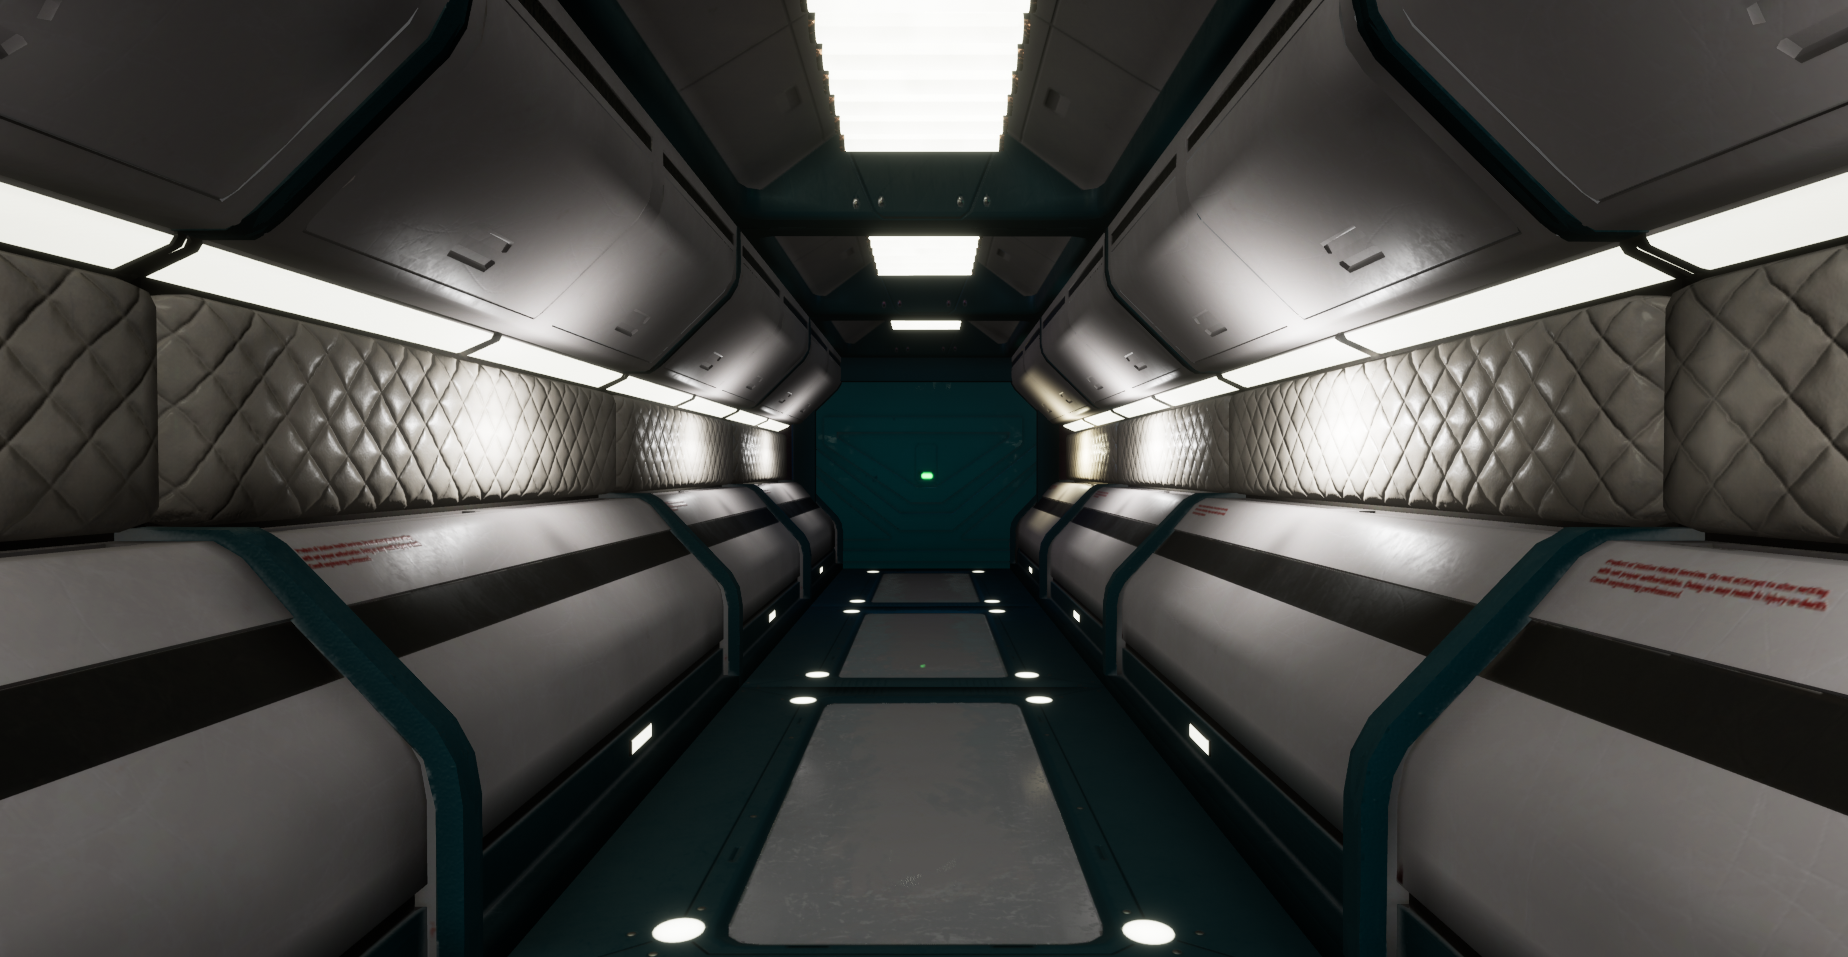
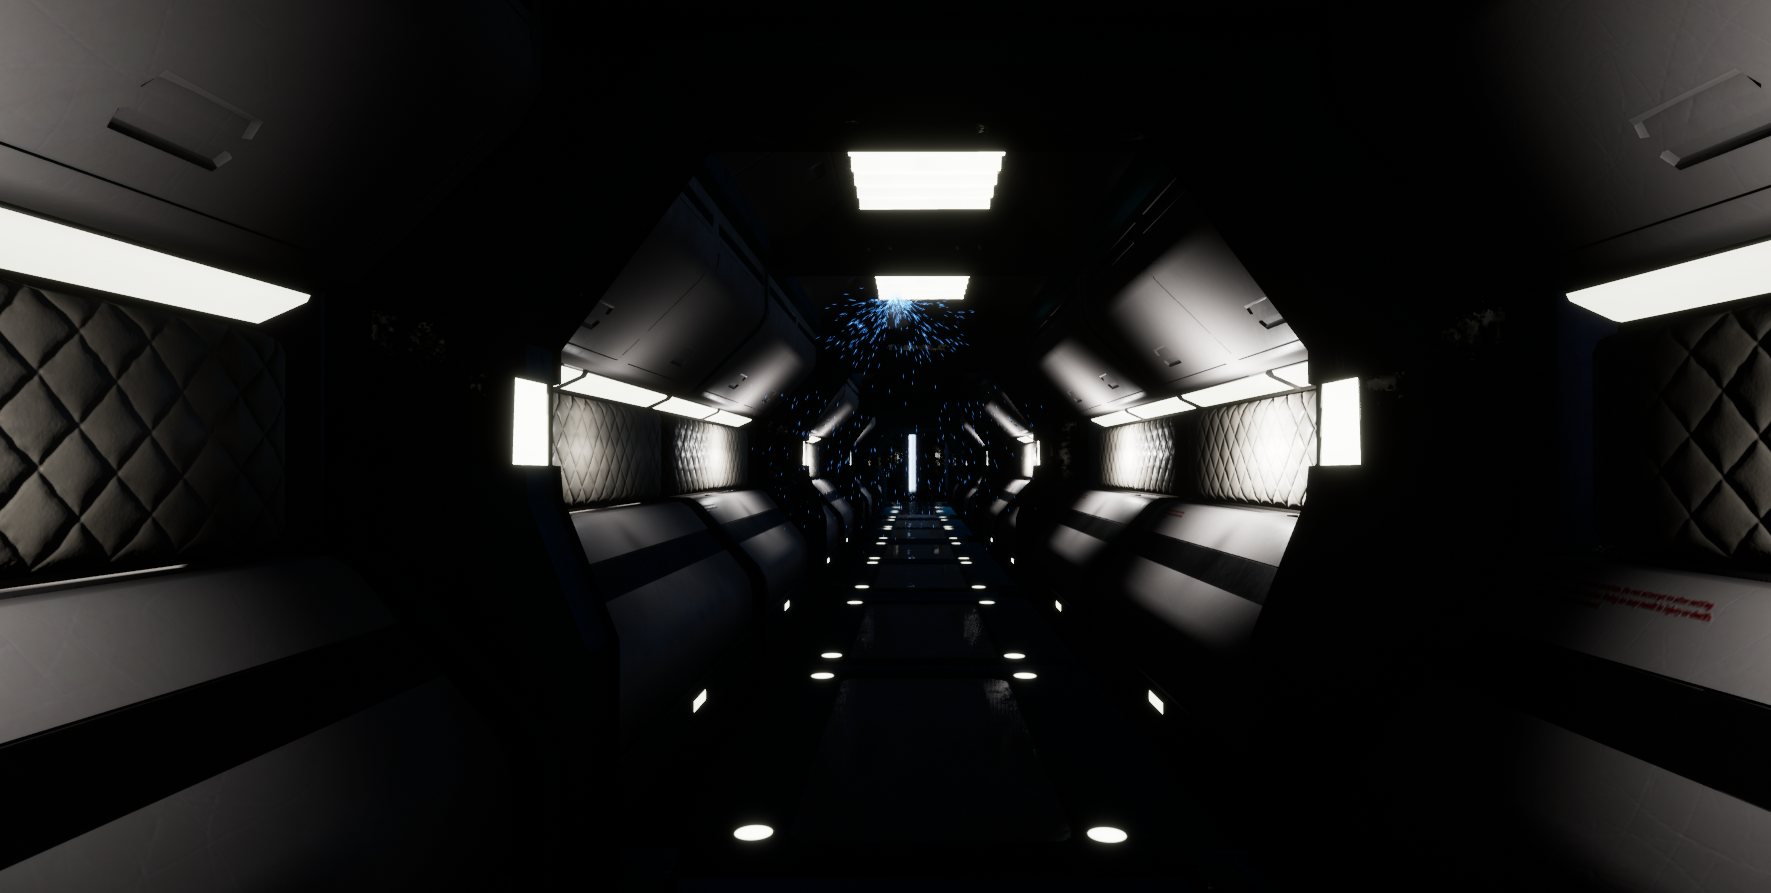
View of sky from inside level
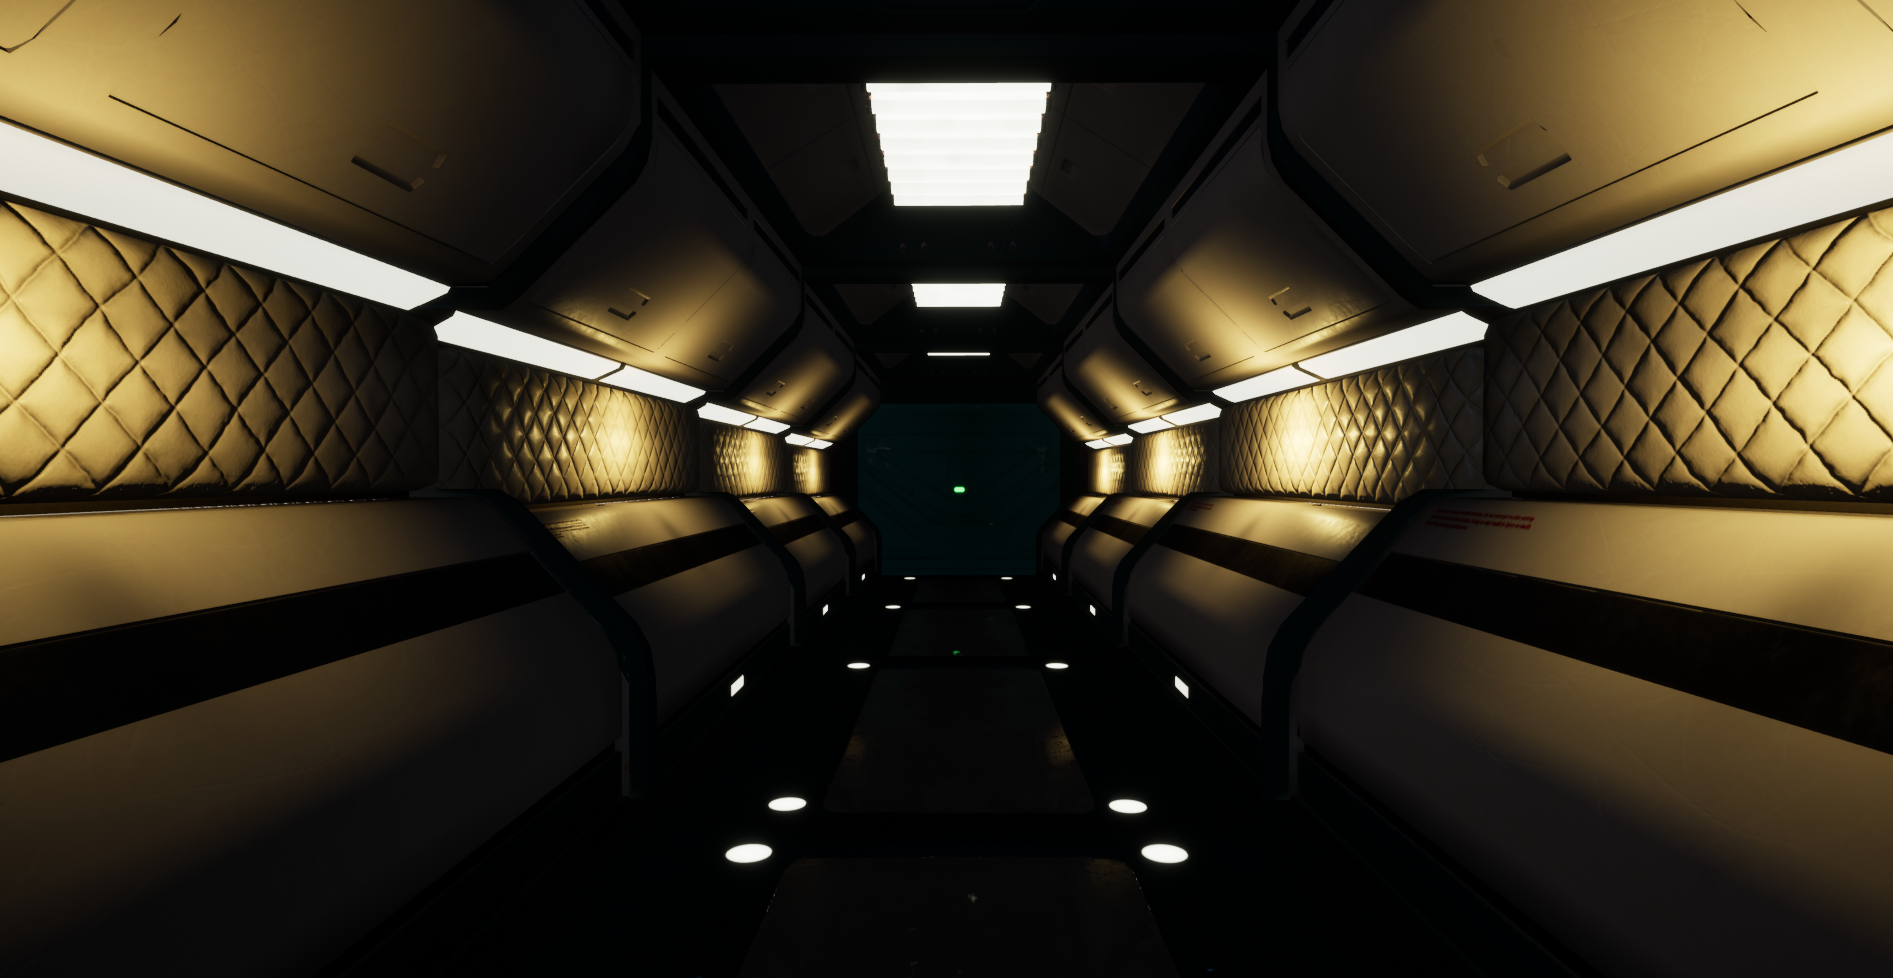
Most of the environmental assets I chose were modular on purpose. I wanted something modular that allowed me to quick build, iterate and provide variation.
Examples of hallways made with modular assets.
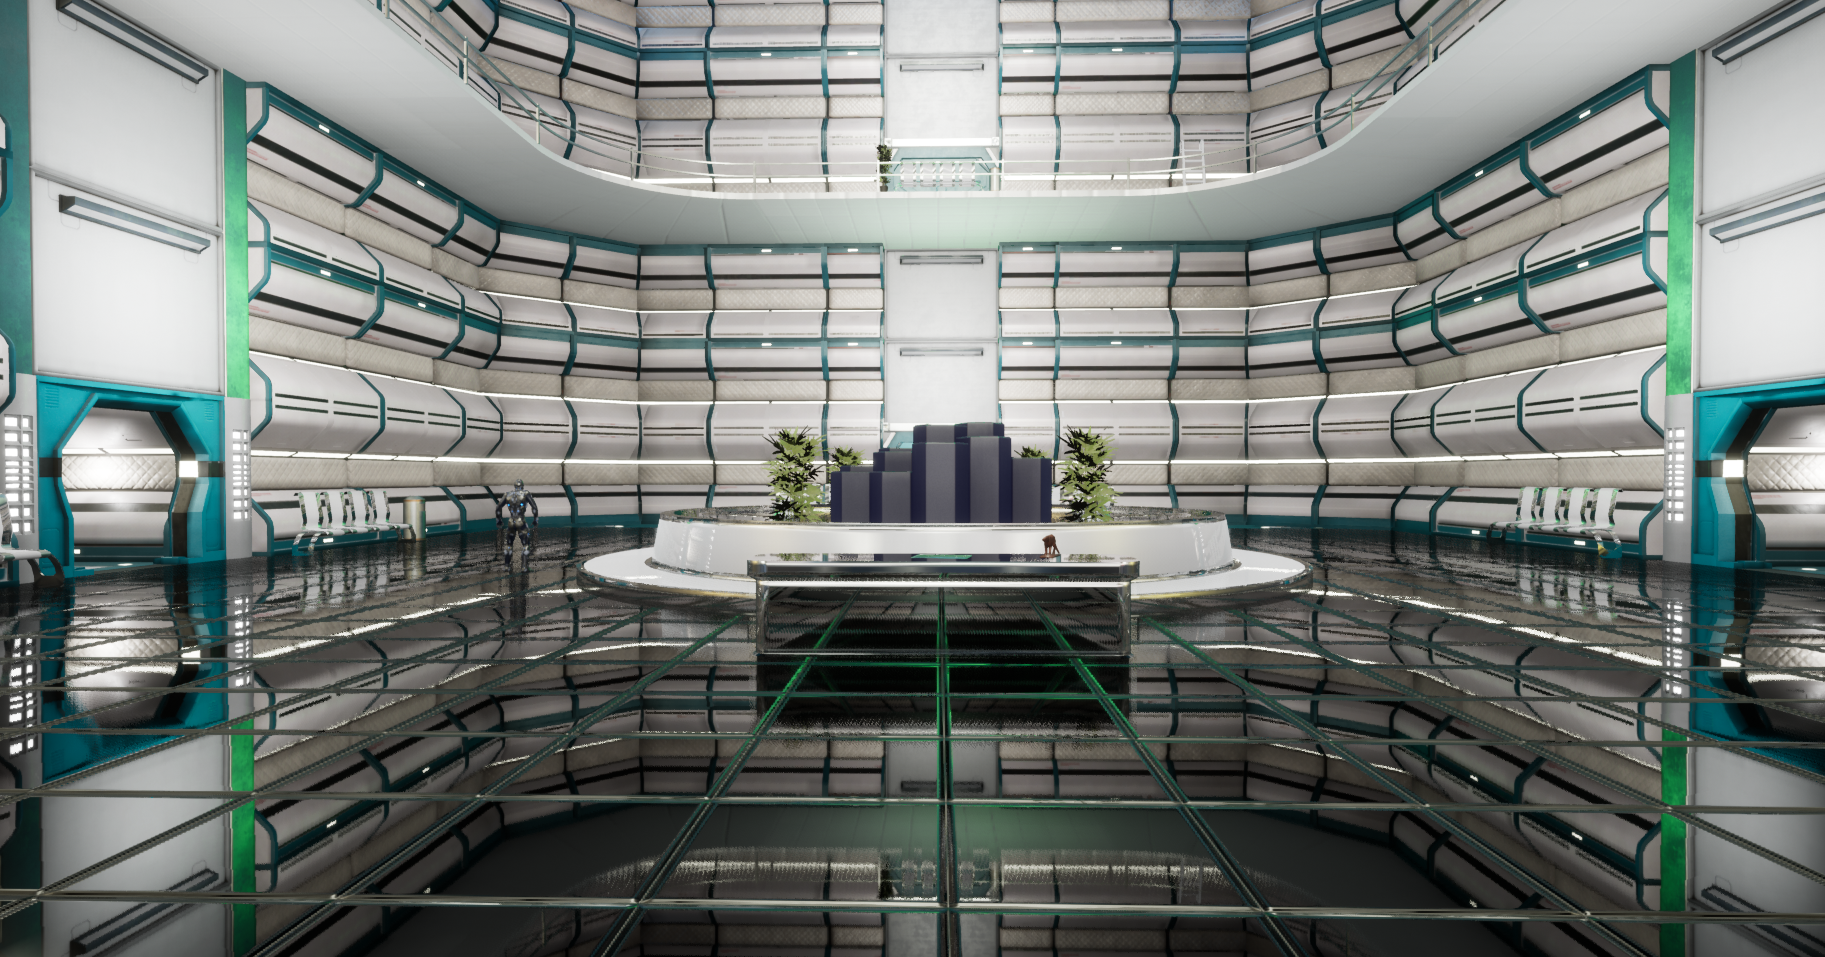
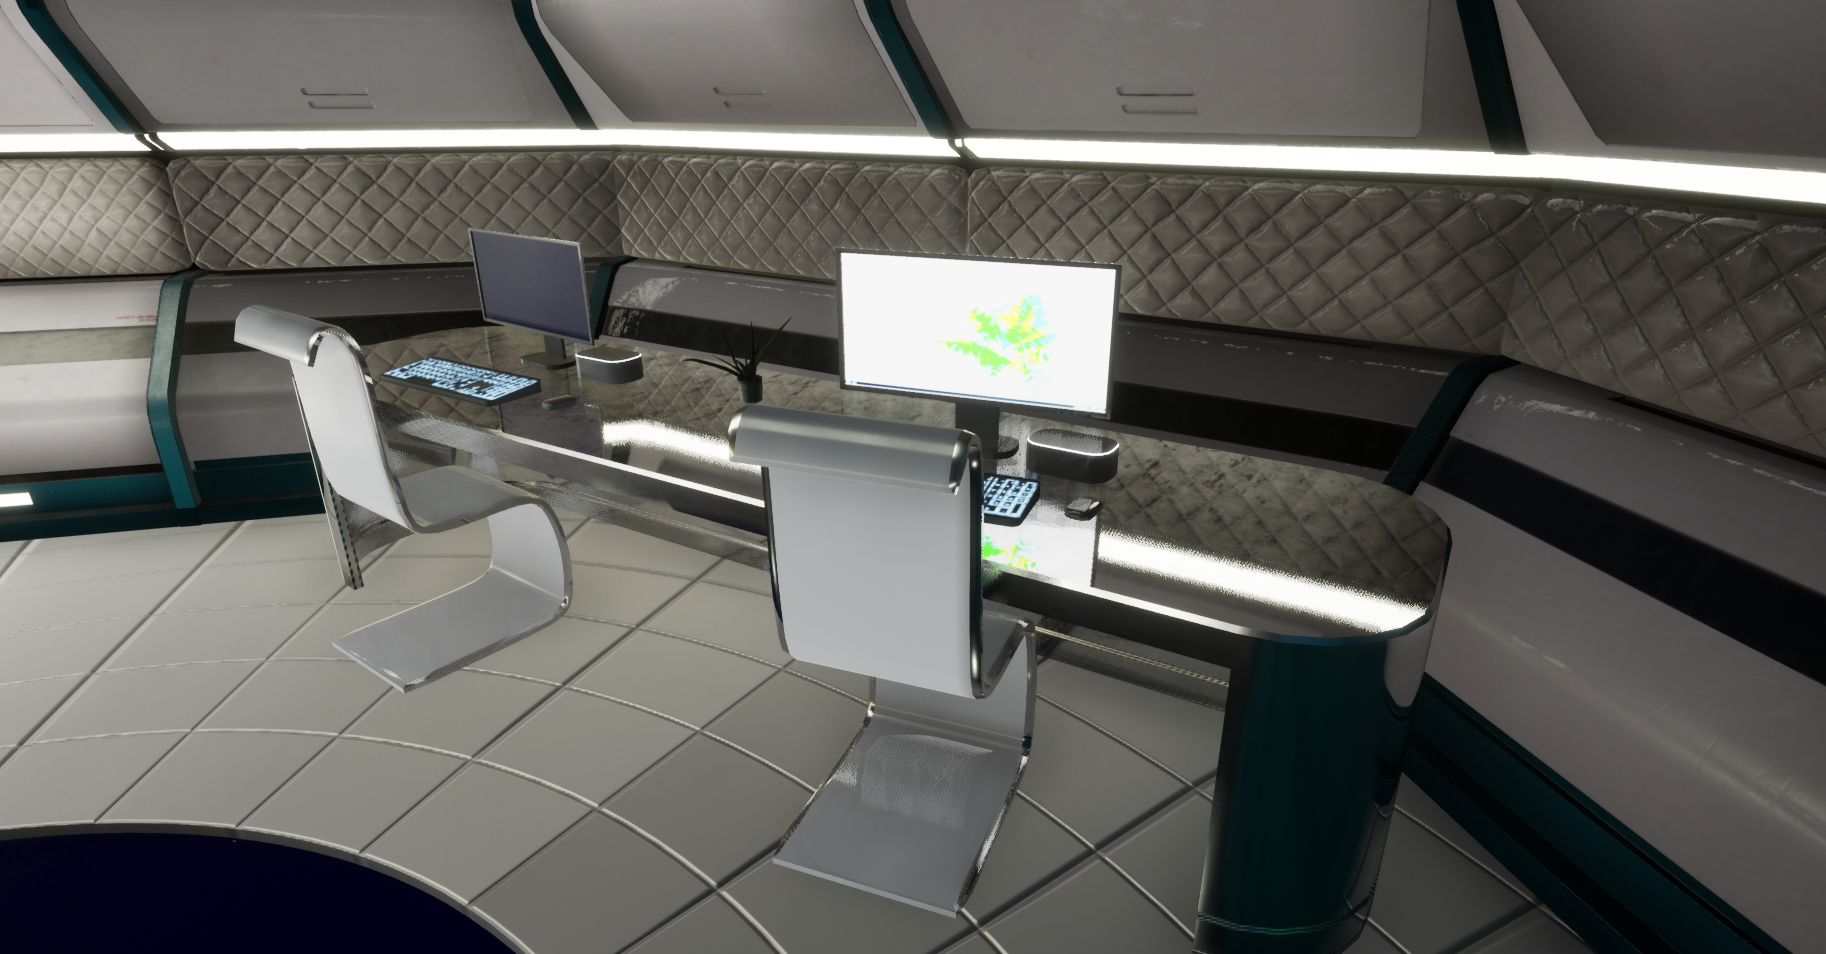
I did a lot of iteration though. I wanted the space station to feel like everything was connected from a central hub with each wing having a focus. The initial rooms fell flat and I rebuilt them a couple of times until I was satisfied.
Initial atrium
Final atrium
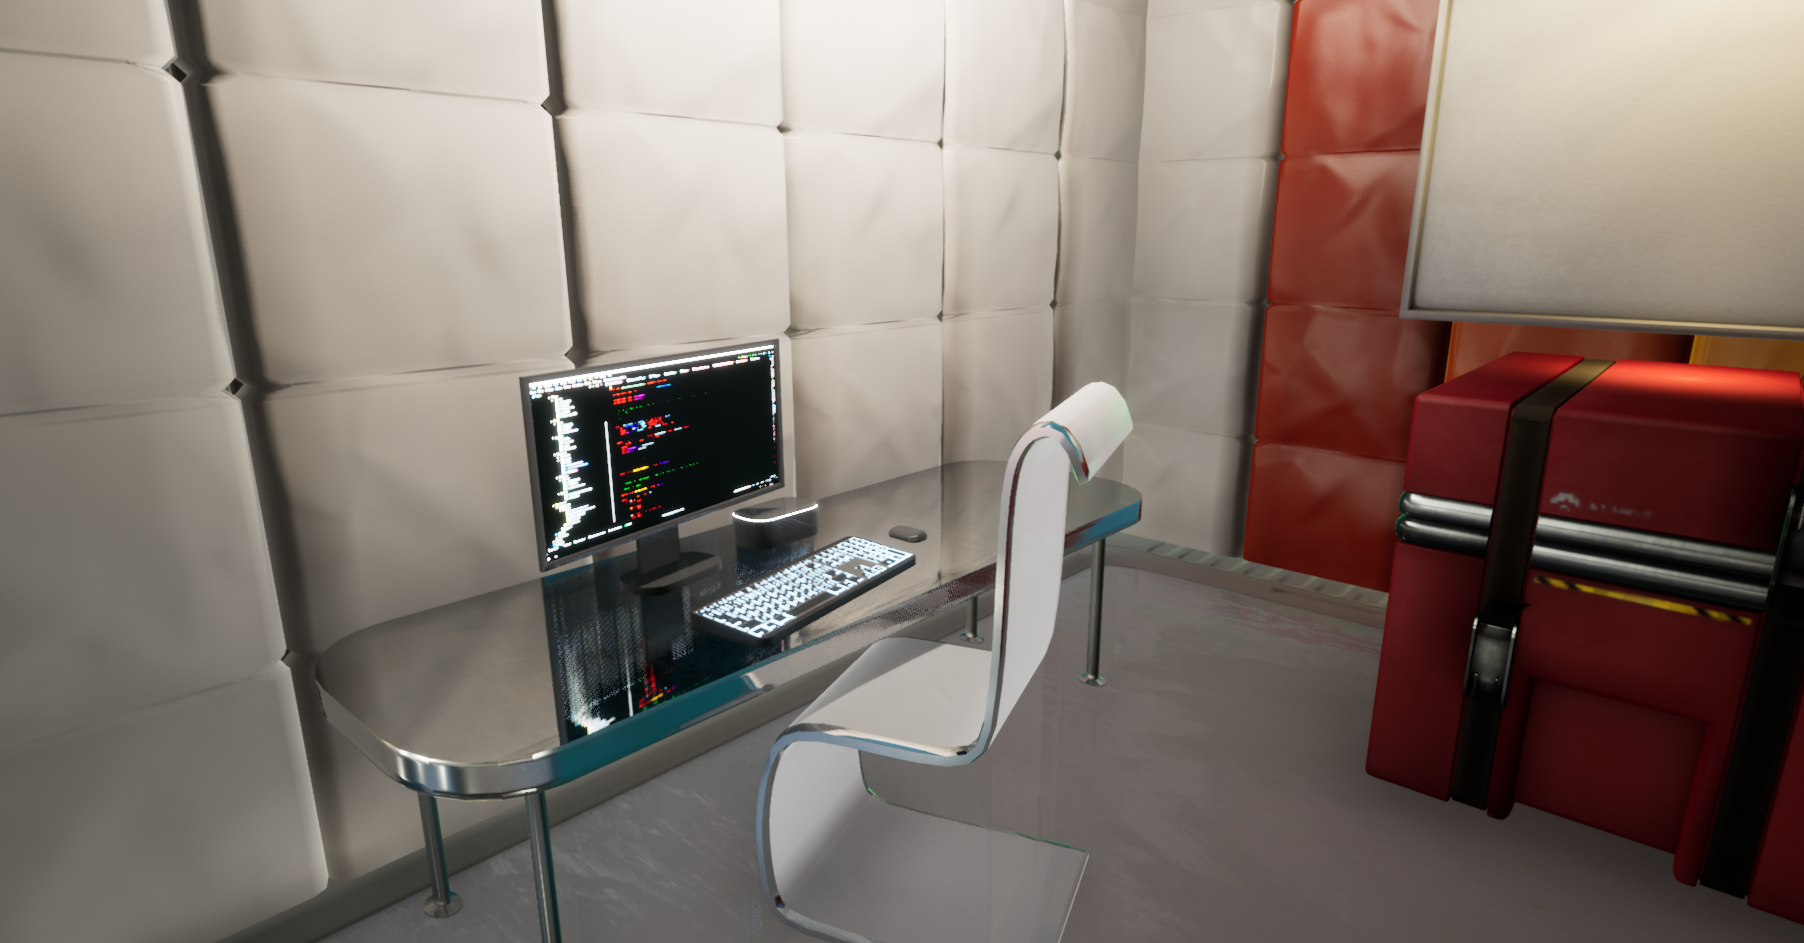
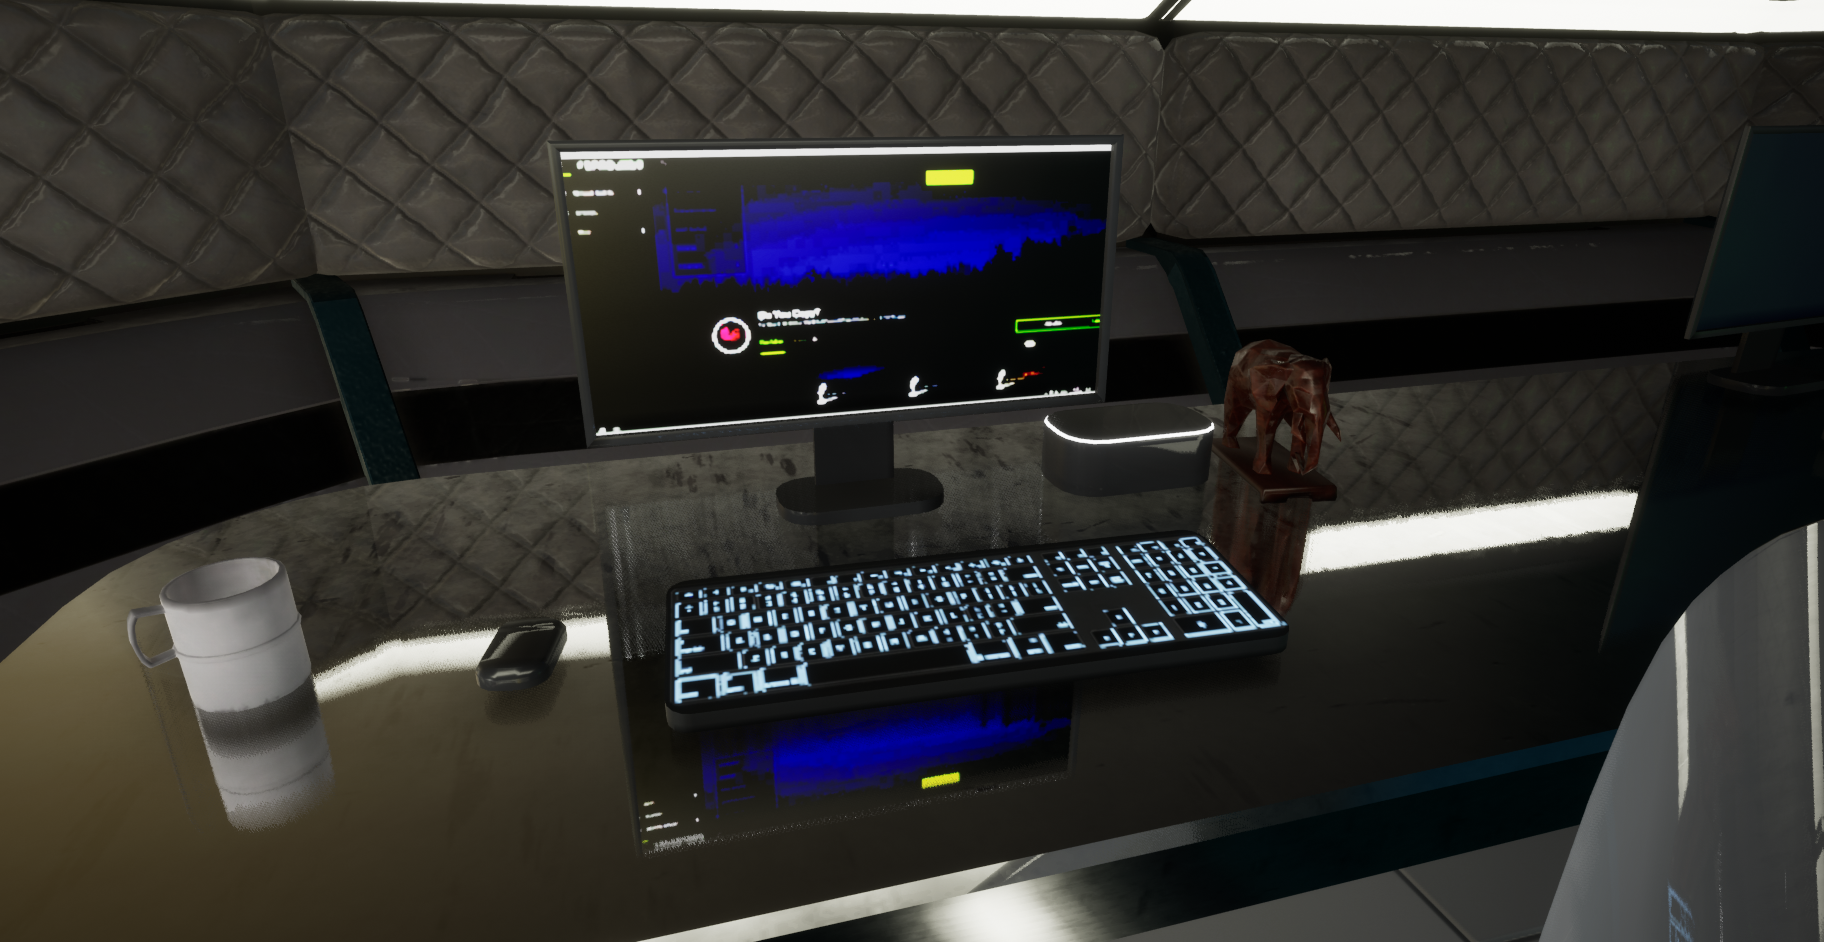
My goal was to make all the rooms “feel” different even if they weren’t. Part of the reason I got the animal statues pack (Animal Triangle by Artem Bayankin) was so I could add character to rooms. I wanted it to feel like people were actually there. I created a number of materials for the computer monitors and tablets.
Variation of computer screens.
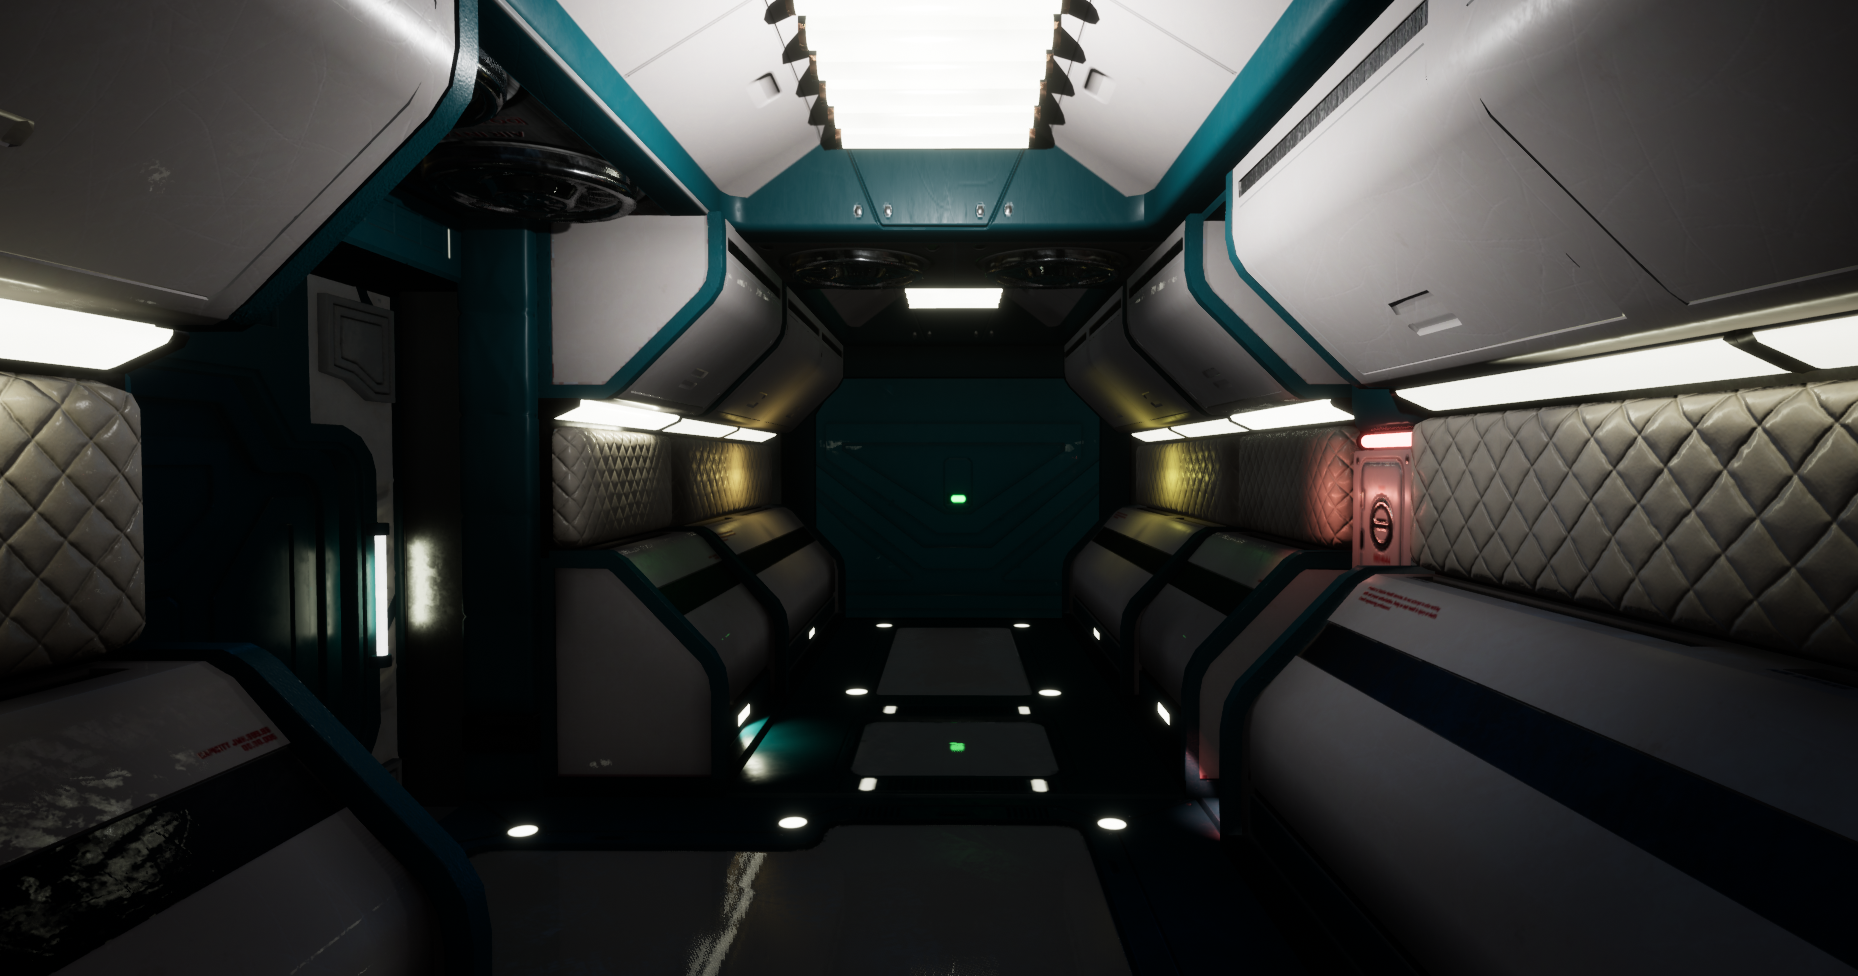
As part of making the level feel different, I threw in a lot of lighting variety throughout the map. Some of this was for performance reasons (discussed later). Otherwise, it was done to make it seem more real. Lighting in reality is never perfectly balanced everywhere, so I wanted the map to feel the same. Some areas of the map, I simply switched a light color to give a feeling of a replaced bulb. Other areas I wanted to see more ominous like that “dark hallway” so many buildings in real-life happened to have.
Lighting Variation Throughout the Map
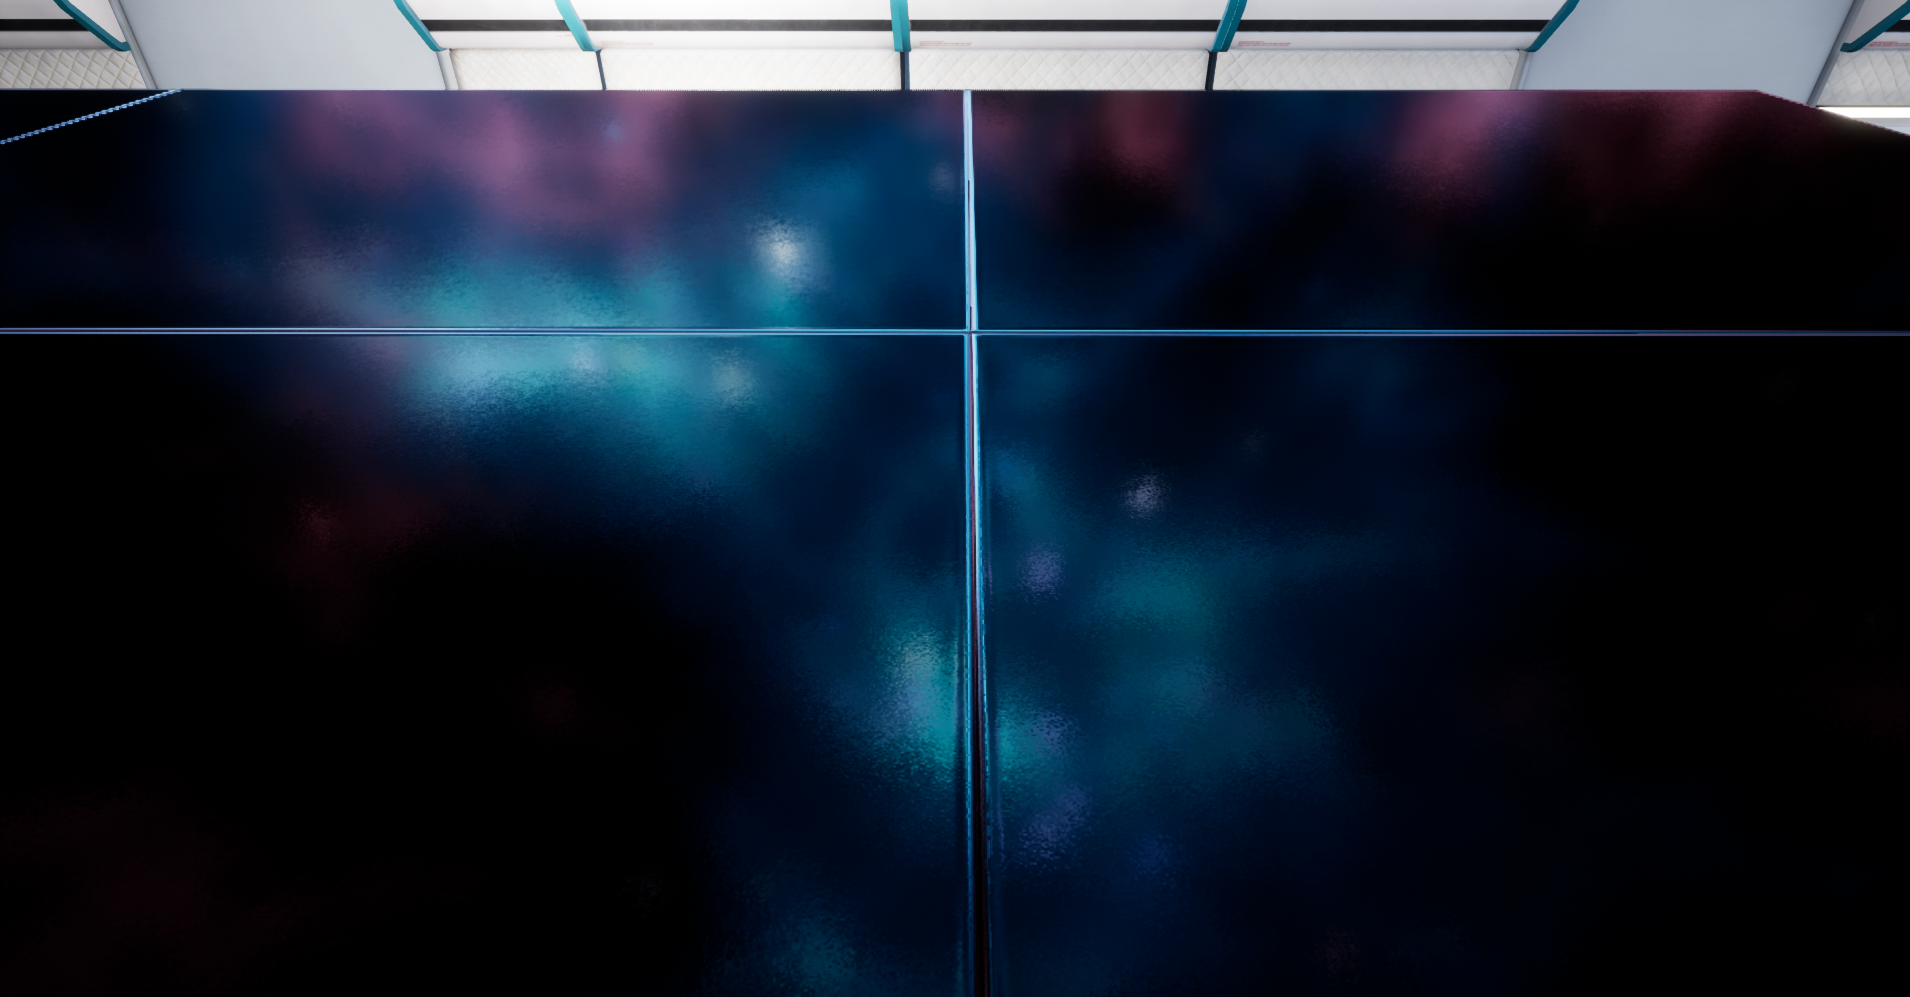
Most of the reflections in the game reflect the skybox, but this did not make sense in a lot of areas that do not have direct view of the sky. Instead I created a static texture of the most common room and used it for reflections with a Sphere Reflection Capture.
Reflection of Skybox on Surface
Custom Reflection with Sphere Reflection Captures
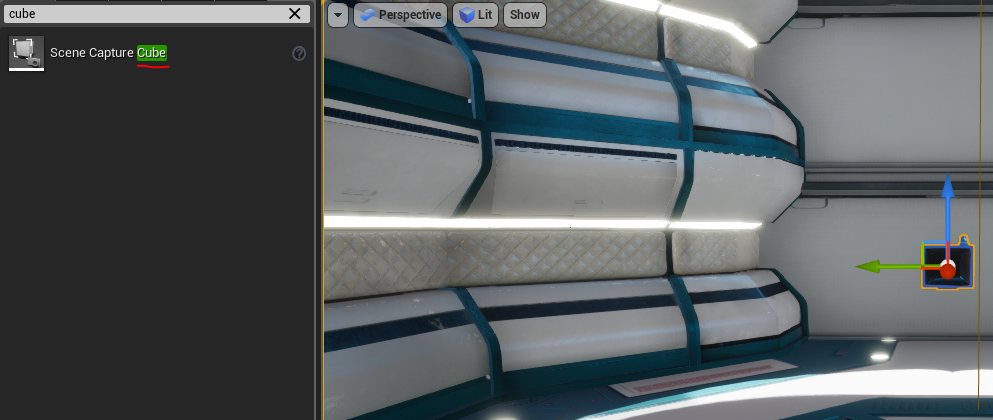
This is done by throwing a scene capture cube into an area where the reflections would look convincing enough in other rooms.
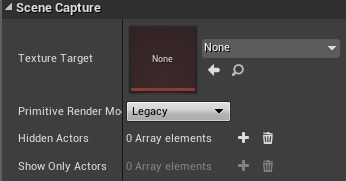
Scene Capture Cube in a Generic Room
Once reflections are built, this drops out to a texture target on the right (by assigning it to a new cube render target).
Scene captures are expensive to run, so once the texture is populated (build -> build reflection captures), I made a static texture by right clicking the render target texture in the content browser and choosing “create static texture”. Once that was all saved, I deleted the scene capture cube and cube render target to save performance. I didn’t need them once I got the texture.
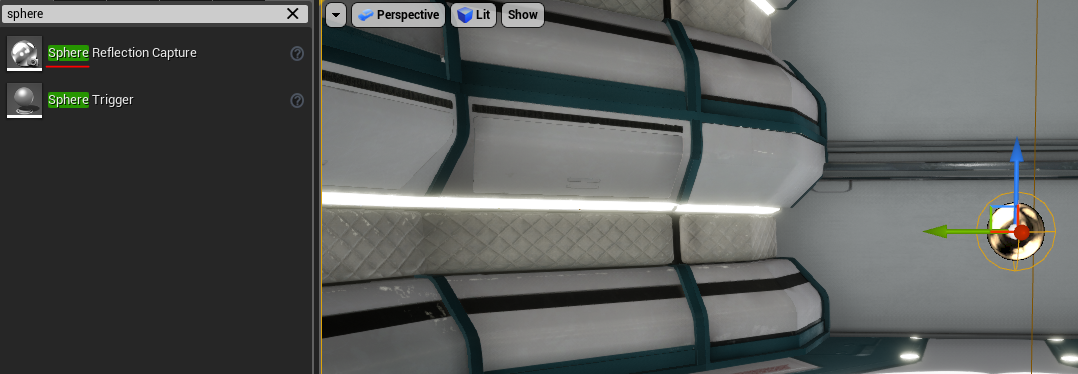
Then I just created sphere reflection captures in various places on the map where I needed better reflections. Each reflection capture sphere can pull from a specific texture, so setting this to something more generic makes reflections appear more accurate fairly cheaply.
Sphere Reflection Capture set to reflect from the generated texture.
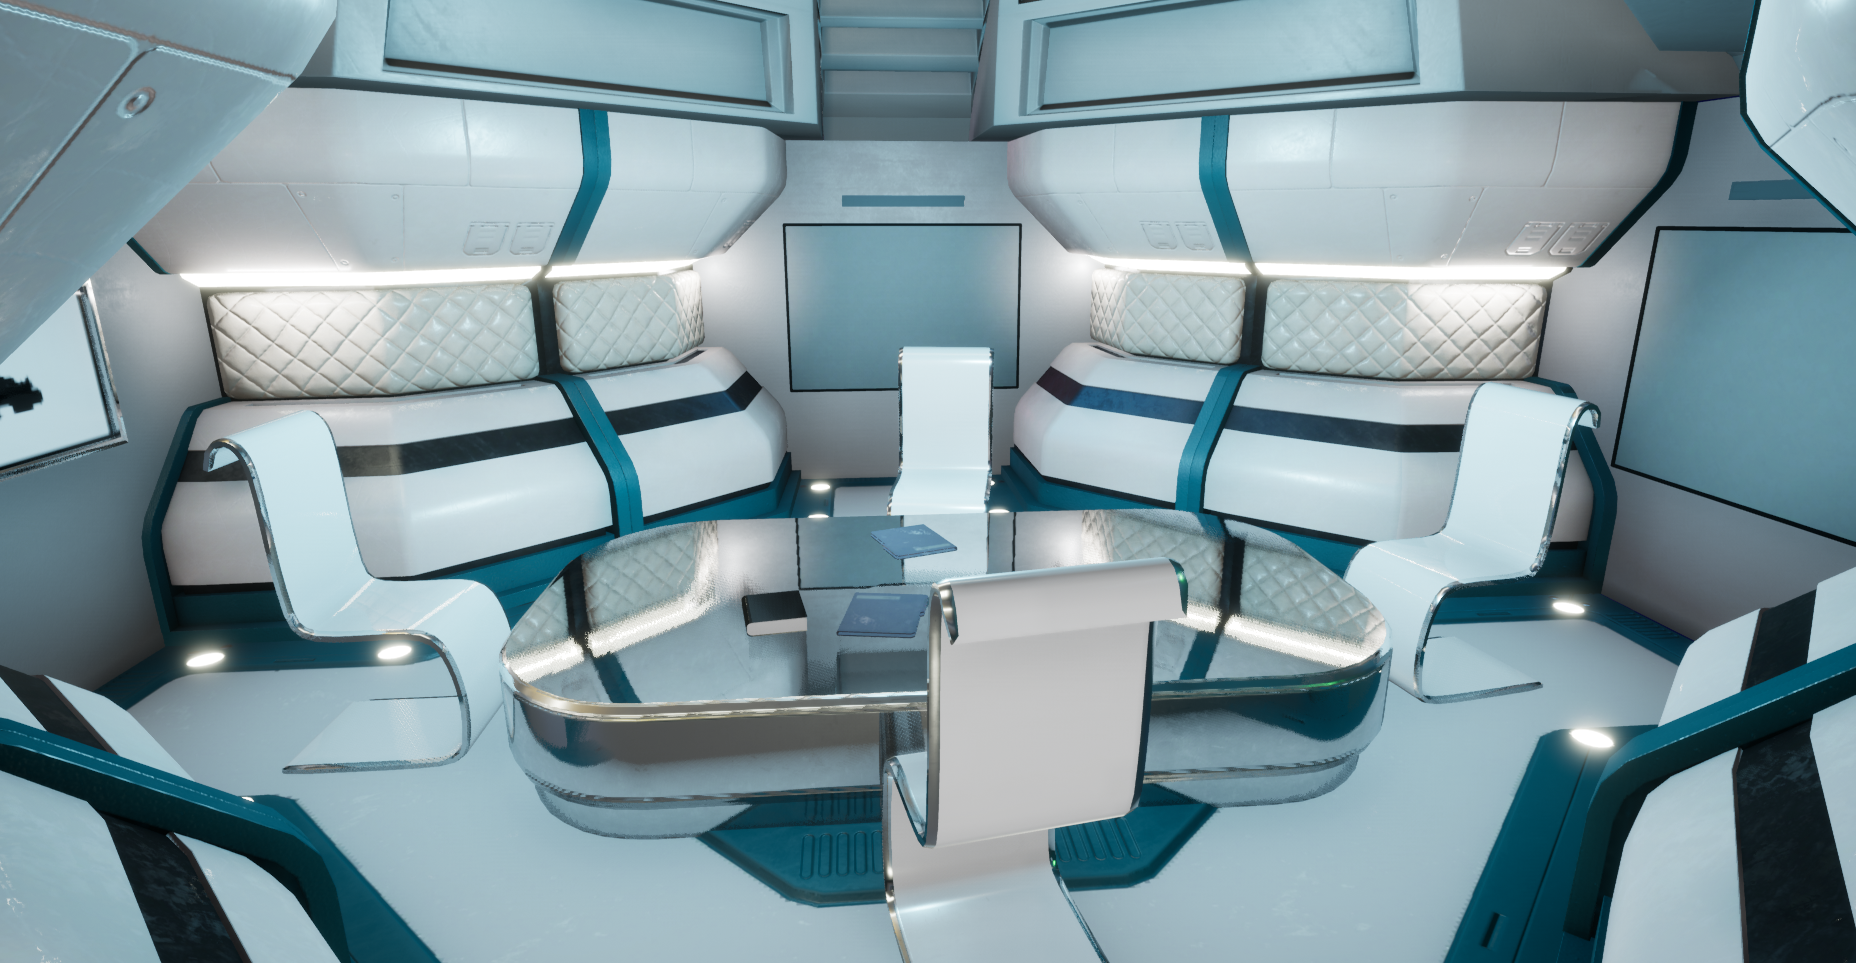
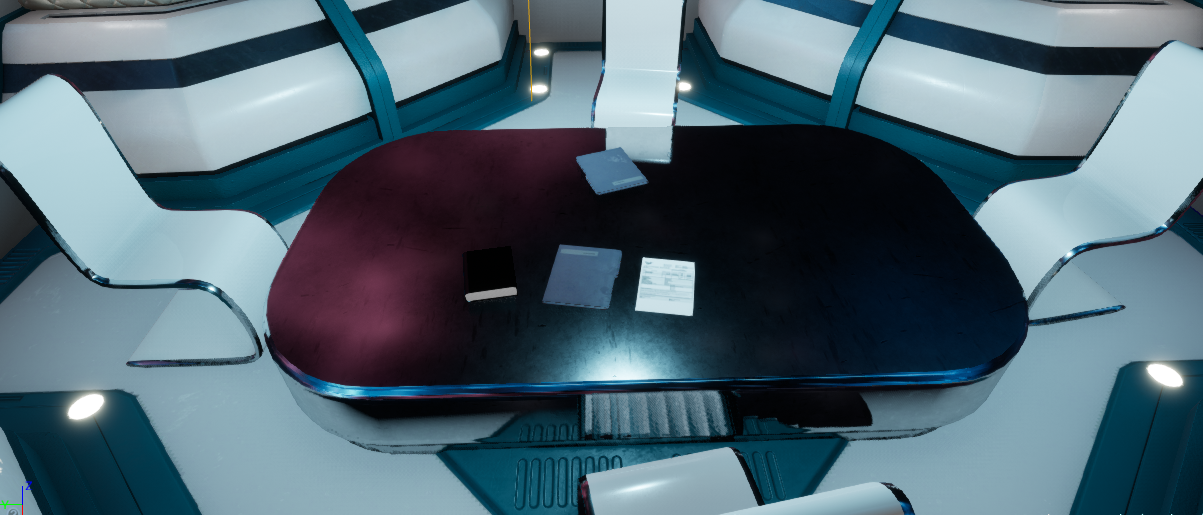
Metal table before reflection captures
End result with reflection capture set to generated texture instead of the skybox.
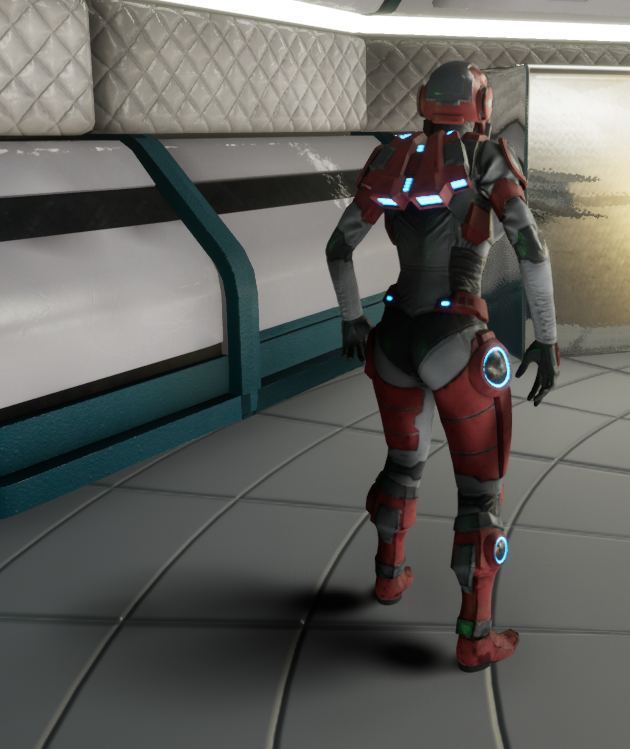
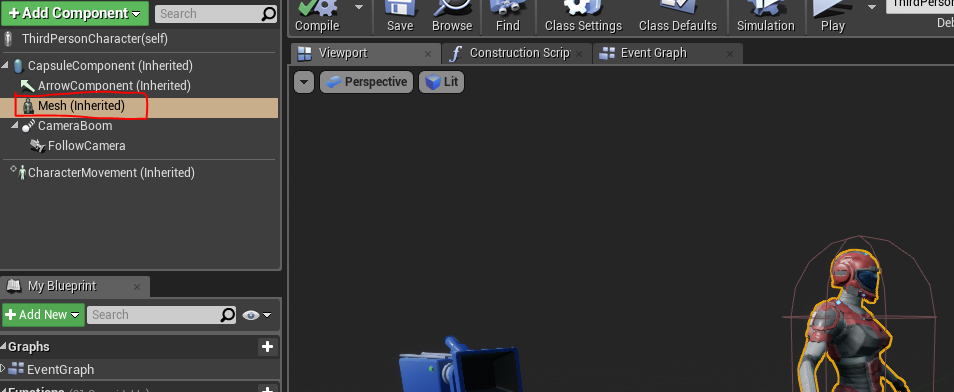
The character uses a capsule shadow for a higher quality visual. Capsule shadows allow us to do some nice shadows on the character fairly cheaply. These are relatively easy to use in Unreal, but have a few pre-reqs.
Instructions and requirements:
https://docs.unrealengine.com/en-us/Engine/Rendering/LightingAndShadows/CapsuleShadows/Overview
Capsule shadows of player drawn on floor and walls.
This is enabled in the character mesh by assigning a physics asset to the Shadow Physics Asset under Lighting.
Once enabled, you can modify the settings on the mesh in your character blueprint.
One of my goals was to have AI robots wandering the map performing different tasks. The AI are fairly simple. Each bot is given a job (or jobs) by assigning a tag. Throughout the map, there are invisible actors that have tags on them describing them as being part of a certain ‘job’.
Each AI has a custom event that runs every 60 seconds to check if they have ‘completed’ a job. If not, it randomly selects a node in the world that matches one of the tags this AI has for a job and sends the AI there. If the AI has been at the same actor for more than 60 seconds, it will flag the job as complete and move on.
Since this only checks for each AI every 60 seconds, it’s quite lightweight. I wanted to do more with this system, but didn’t have the time to make custom animations of bots working at tasks.
To make sure the bots all had variation to them, their initial jobs are staggered between 5 and 60 seconds, so it appears that bots are much more active than they are. At any given time, there’s a very high chance players will run into bots walking towards their next job.
AI Walking Around
For the player to interact with the bots, there’s a few different things happening. Each bot has a trigger volume around it checking only for the player. If the player enters the trigger volume, the bot will immediately stop walking towards its job giving the player an opportunity to interact.
When the player enters the trigger volume, the bot also has a 20% chance of saying some form of greeting from an array of six greetings. When it was 100% of the time, it got annoying quickly. When it is 20% of the time, it feels more subtle. The six greetings are for variation.
If the player engages in conversation, it calls “AI Move To” so the bot moves closer to the player and faces them. I had wanted to do a more convincing turn towards the player but again, that required animation work I didn’t have time for.
If the player chooses to walk away (leaving the trigger volume), then the bot will wait a second and continue on to the job it was working on.
When the player is overlapping the bot and holds “e” for a second, dialogue will start. When the bot is in range of the player, it will check if the player is holding “e” every 200ms and if it’s been consistent for 1 second, it triggers an event to start dialogue. I chose this so that players did not start dialogue just by accidentally hitting “e”, but had to opt in. Since it only checks every 200ms, the player can let off and replace their finger on “e” without losing progress. That was intentional to both cut down on number of operations running, and to give the player forgiveness while still making them commit to the action.
Bot pausing when player approaches
Besides dialogue, all of the sounds were purchased from the UE4 Marketplace. Music just plays as 2d audio with certain cues to change song. I wanted to ensure variety, so there's a few different background songs included.
Sound effects were a bit different. All of the sound effects are placed carefully within the world. With 2d sounds, all of the sound effects would play simultaneously for a very poor experience. For sound effects based on the world you want to use 3d audio that will play relative to the player's location and direction (spatial audio). Sounds dragged directly into the world do not have a natural cull distance though.
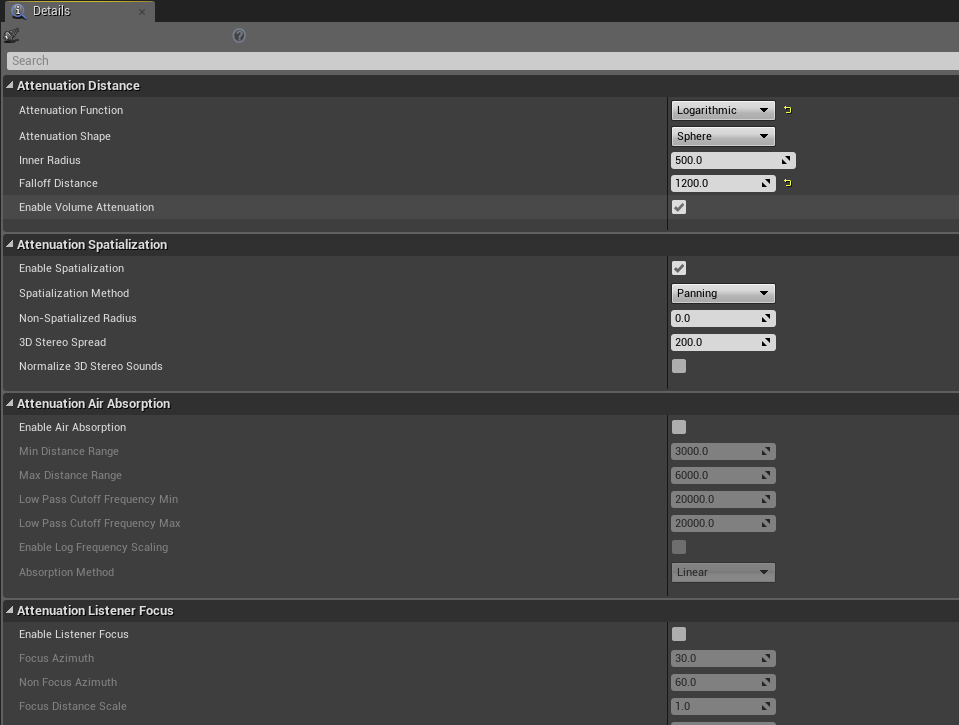
In order to setup spatial audio, you want to create a Sound Attenuation Blueprint. A Sound Attenuation Blueprint allows you to place sounds in the world that have a certain size and falloff range. When placing sounds in the world (or spawning via blueprints), you can specify which sound attenuation class to use. This means you can reuse the same attenuation blueprint for a lot of sounds as long as they have similar properties (for example, all ceiling fan sounds or all elevator sounds).
Attenuation Settings
Due to the nature of sound effects, many of the sounds will require different attenuation settings. For example, an engine might be louder than a ceiling fan and be heard from a further distance. You have to test the distances with each sound. You'll probably want deeper sounds to have a further falloff distance since bass usually carries through the environment more.
There might be exceptions to that to consider. Is the room the sound is in, sound proof or underground? Is the room the sound is in more like a cave with a lot of echoes? Is there outer space in between the sound and the player that would prevent sound from being carried? Each sound has to be individually evaluated based on where it is in the world and what is around it. I spent a lot of time just adjusting each sound I had in the world, trying to get it to sound realistic.
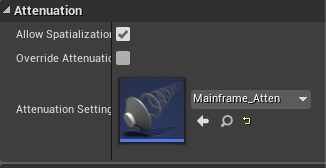
To apply a sound attenuation class, click on the sound in the world (or during the spawn call in blueprints), go to the attenuation settings, enable 'allow spatialization' and choose the sound attenuation class to use.
Adding attenuation to sound
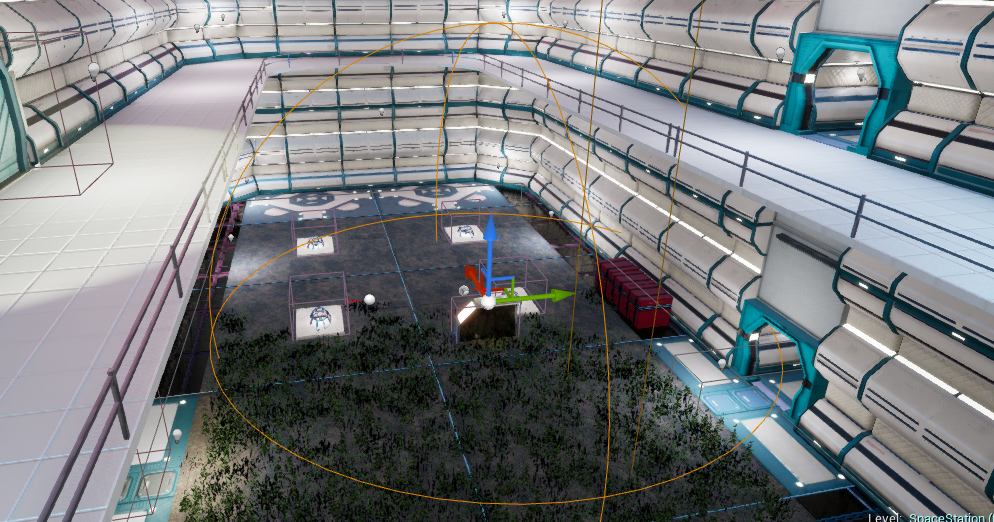
Once the attenuation settings have been added, you will see a circle around the sound to see where it can be heard. You may need to move further out to see it. Then it's just a matter of testing to make sure the sound size and falloff feel good. Does the sound feel like it's being heard too early? Does it sound like you suddenly cannot hear it when you walk away? Does it feel like the sound suddenly snaps in while the player is walking? All of these things will mean more adjustments to the attenuation.
Sound attenuation sphere shown in world after attenuation class has been added to the sound.
A huge thanks to the people who volunteered their time for voice acting.
One of the things I wanted for this demo was voice acting and subtitles. Both are common in games, yet I have never worked with them. This gave me an opportunity to work with voice acting and subtitles.
One big thing I learned is that voice acting is hard. I knew it was hard, but I didn’t know why it was hard. It takes quite a few tries to get a good take. That is, a take with clean audio, clearly spoken, correct inflections, correct words emphasized, etc. A mistake I made was recording voice actors in isolation. Rookie mistake. I’m a programmer. This is why I did the project.
Since voice actors were recorded individually, dialogue does not flow well. The voice actors did a great job. Every line in isolation sounds wonderful, but together the subtle inflections of spoken voice do not align. For the robots that’s fine because we accept that they are uncanny, but for humans it seems unsettling. The right inflection may sound wrong when following a certain tone. A certain pitch may sound more cheery or questioning than threatening or sinister.
Again, the voice actors did great and made subtle improvements to the original script to sound more like spoken language. The problem was that the voice actors were not in the same room speaking to each other, so when lines are put together in-game, it doesn’t sound right.
After the voice was recorded, there was hours of editing sound files for Unreal. Besides the main character, all other voices were edited in Adobe Audition to make robot voices and correct file formats.
Look at Unreal’s guidelines for audio files. The main requirement is 16bit wav files, but there’s a little bit more to it than that. Full guidelines are here:
https://docs.unrealengine.com/en-us/Engine/Audio/WAV
Each line of dialogue is initiated by the player. Once the robot delivers a point, the control is given back to the player to allow them to re-engage or move on. I wanted to do more with this system, but I did not have time, so the tech is there with little variation for the player.
Currently engaging in dialogue locks the player into a small cutscene. Given how linear the dialogue is, this was unnecessary. I had thoughts of branching dialogue selection, but I did not have the free time to implement it. Again, the tech is there, but the gameplay is not.
Movements and jumping disabled during dialogue. Camera still has free rotation around the character.
I added subtitles for each line of dialogue. I provided a setting to allow players to enable or disable subtitles, with them being on by default.
I knew I wanted to work with subtitles because they add a lot to games in terms of accessibility, language access and convenience. Not all players are capable of understanding the spoken words or having audio loud enough to catch everything.
Some recommendations for subtitles and accessibility in general:
http://gameaccessibilityguidelines.com/provide-subtitles-for-all-important-speech/
http://gameaccessibilityguidelines.com/provide-subtitles-for-supplementary-speech/
http://gameaccessibilityguidelines.com/tomb-raider-subtitles-2/
http://gameaccessibilityguidelines.com/provide-high-contrast-between-text-and-background/
I admit I did not follow all of those guidelines myself, but I should have. Having different colors for different characters in subtitles helps players follow along. Ideally the contrast between colors is such that colorblind players can easily tell the difference between lines of dialogue in the subtitles, but that’s not always possible. It should still be clear which character is speaking regardless of the color. Important to note: 8-10% of male players are colorblind -
From the beginning I planned on having settings screens so I could learn how quality settings work in Unreal.
Final Settings Screen
All of my settings are controlled through the game instance blueprint because it does not get reset between levels. I can seamlessly move between various levels without user settings getting reset.
The volume settings are set globally with different settings for sound effects and music. In retrospect, I wish I had broken the voice acting out as well. Currently voice acting is under effect volume, so you cannot lower sound effects like machinery and voice acting separately.
To change the volume globally, I took advice from here -
https://www.reddit.com/r/unrealengine/comments/7412r1/unreal_engine_4_how_to_change_audio_volume/
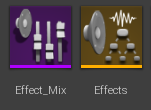
The general idea is to create a sound class and a sound mix for each type of sound. The sound class can be assigned to any sounds to categorize them. The sound mix can be manipulated to change any songs that use a certain sound class.
Once the sound mix is created, the corresponding sound class has to be assigned to it.
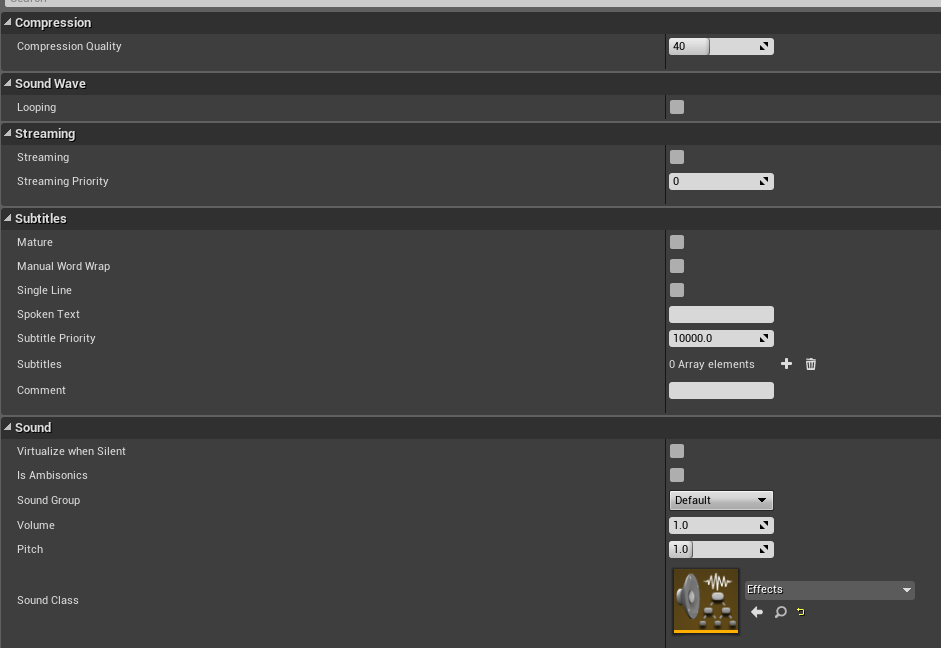
Any individual sound can then be assigned to the correct sound class. Changes to the sound class will then affect this sound.
Not all sounds have the same volume. Ideally they do, but in many cases they won’t. The volume variable on the sound class & mix affect all sounds that use the sound class, which means it still won’t boost or lower every sound to the same level of audio. Instead individual audio files should be manipulated within at their settings screen. The volume within the audio asset settings will stay relative to the sound class.
If a sound asset is set to a volume of 1.2 and the sound class is set to a volume one 1, the sound asset will play at 1 x 1.2. If the sound asset is set to 1.2 and the sound class is set to 2, then the sound asset will play at 2 x 1.2. This gives us the flexibility to increase overly quiet sounds or decrease overly loud sounds, while still being able to manipulate the audio globally.
This will allow us to make changes to volume in the audio mix, which then changes any sound that uses the corresponding sound class. That means one change to our mix can lower or increase the volume of many sounds globally.
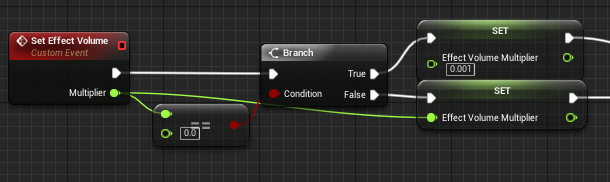
When the sound is changed, you have to check if the volume is actually 0 or not. In Unreal, if sounds are set to 0, it will remove the sound completely and set them to null (and likely throw errors for global sounds since they will be null). In some cases, we absolutely want sounds to be removed (like in the event of a one-time sound, such as an explosion). Let one-time sounds go to zero so they are removed (or remove them manually when needed). Otherwise, they will linger in memory.
For sounds we need to keep spawned, then just set volume to something so low it cannot be heard, such as 0.0001 or lower.
Once the volume is known, we need to override our sound mix volume and call “push sound mix modifier”. The changes will not update unless you call “push sound mix modifier”.
I’m also using a base effect volume, but it’s unnecessary. I did that because many of my sounds were a bit aggressive and instead of modifying them again to lower their volume individually, I just decided to cut the multiplier. The highest volume my effect sound mix ever gets to is 0.5. I feel like doing this per-asset, like I described above, is a better solution and lets you keep your mix volume from 0 to 1.
All of my subtitles are just widgets, so enabling/disabling subtitles is fairly straightforward. Any calls to make subtitles hit a branch that checks if subtitles are enabled. When the user setting is changed, the variable in the game instance is updated.
My video settings are a bit more complex, but I hope this proves useful to others.
Since sliders in widgets are from 0 to 1, I did some quick mapping to make sure the final value was between 90 and 120. One could certainly go lower or higher with their game, but it did not make sense in mine.
I stored the mapped value in the game instance (again so settings worked between levels).
Then I just updated the field of view on the player’s camera.
I only supported fullscreen borderless and windowed, but proper fullscreen is certainly possible. My demo launches in windowed mode, but can be switched between fullscreen borderless or windowed at any time. Currently the demo does not store the last user preference, but that could be possible with a save state.
In fact, all of the settings could be stored in a save state and reloaded on launch.
https://docs.unrealengine.com/en-US/Gameplay/SaveGame/Blueprints
The settings window just toggles the game instance’s borderless boolean and updates with this code. I’m getting the
I’m getting the game’s settings to get the screen resolution, but one could easily have a pre-selected list of resolutions to support for performance reasons.
If the user switches to windowed mode, I run the command
r.setRes 1280x720w
That will set the resolution to windowed (w) and change resolution. The concept is the same for borderless, but with a different flag.
Call r.setRes with whichever mode and screen resolution you want.
w = windowed (allows user to drag and resize)
f = fullscreen
w f = windowed fullscreen (borderless)
Fullscreen example:
r.setRes 1920x1080f
Borderless example:
r.setRes 1920x1080wf
Note: I am not sure if it’s possible to restrict resizing the window in blueprints. Mine allows the windowed version to be freely resized by the user. I think you can restrict this in c++, but I have not tried it.
I wanted to have several presets of graphics quality for different levels of hardware.
I only used a subset of options available in UE4, but a lot of customization can be done -
https://docs.unrealengine.com/en-us/Engine/Performance/Scalability/ScalabilityReference
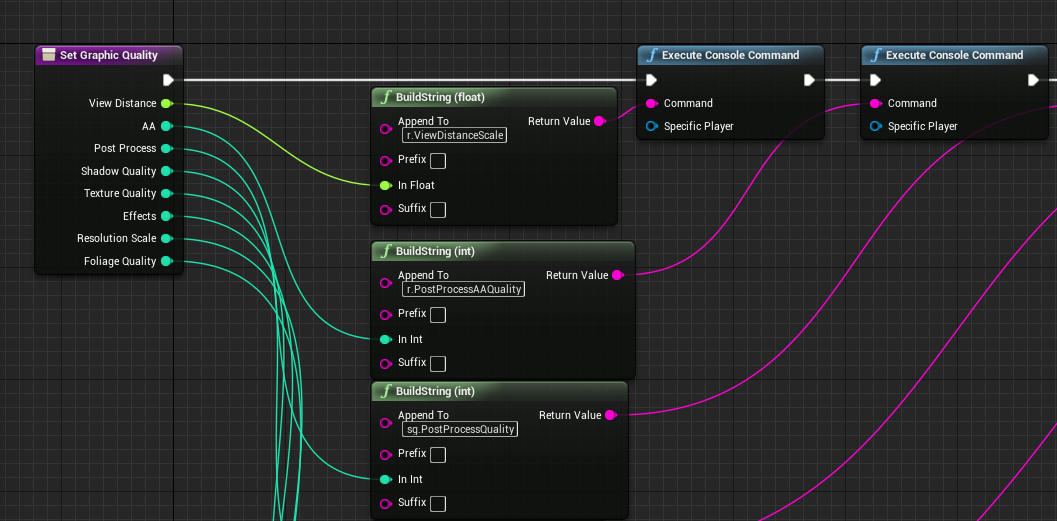
I created a convenience function for switching settings I wanted.
The commands I ended up using for high quality were -
r.ViewDistanceScale 1.0
r.PostProcessAAQuality 6
sg.PostProcessQuality 3
sg.ShadowQuality 3
sg.TextureQuality 3
sg.EffectsQuality 3
r.ScreenPercentage 100
sg.FoliageQuality 3
Example of my medium and high settings:
Restoring Settings Between Levels
Some of my settings need to be reset between levels because they rely on things in the level. Each level makes a call to my game instance to update the settings for the level. I actually just have it update all the settings even if it does not need to. I do not have a lot of settings, so I figured that was the cleanest update.
Example of FOV and fullscreen settings being updated
Throughout stages of development, I ran into issues where performance kept dipping lower than I wanted. I wanted the game to be fairly lightweight, especially given the scope of the project.
Some of these tricks I stole from GDC talks about Unreal Performance.
These were the main talks I learned from. Hugely thankful to Epic for sharing.
Robo Recall Performance Optimization - https://www.youtube.com/watch?v=3Yx9IEOc5s4
Optimizing UE4 for Fortnite Part 1 - https://www.youtube.com/watch?v=KHWquMYtji0
Optimizing UE4 for Fortnite Part 2 - https://www.youtube.com/watch?v=1xiwJukvb60
One of my first issues was just too many triangles. Running ‘ stat RHI’ (stands for rendering hardware interface) gives statistics about triangle counts and memory usage based on what the player can see. As the player looks around, these numbers will update based on what is on screen.
Display of the ‘ stat RHI ’ console command
RHI told me I had 9 millions triangles.. .ouch. I wanted less than 1 million if possible. Much of this is because I just had not set up LODS (level of detail).
[Some reading for anyone not familiar with LODs - https://en.wikipedia.org/wiki/Level_of_detail ]
Unreal has built-in tools for generating and editing LODS -
https://docs.unrealengine.com/en-us/Engine/Content/Types/StaticMeshes/HowTo/LODs
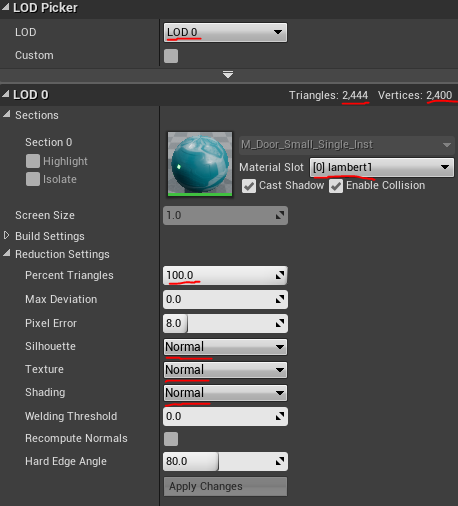
In the static mesh viewer, LODs can be automatically generated under ‘LOD Settings’. The default LOD is 0 which is the full quality mesh (unless edited). For most of my meshes I generated 3 LODs for ‘Number of LODs’
Once the LODs are generated, they need to be edited with the ‘LOD Picker’. You can choose which LOD to edit from the LOD Picker and the screen size (usually distance away from player) when this LOD is shown.
General rule is for each LOD to be half the number of triangles as the previous LOD. For example, by default, the full asset (LOD0) is uses 100% of the triangles while LOD1 uses 50% of the triangles. Once the screen size of this asset gets small enough, LOD1 will be placed in the world instead of LOD0 to save triangles. The lower the better, so if you can go lower than half of the previous, that’s great.
The key to this is making sure the asset still looks good at the distance it’s displayed. I had to carefully check each mesh to see what I could get away with. Some assets start to become quite mangled as the number of triangles lowers. Others meshes can be significantly lowered in number of triangles without visual artifacts. It’s all dependent on the original mesh.
Note: LODS also let us switch textures, shading and hard angles for performance.
This is a comparison of one my asset’s LOD0, LOD1 and LOD2.
LOD0 at full size
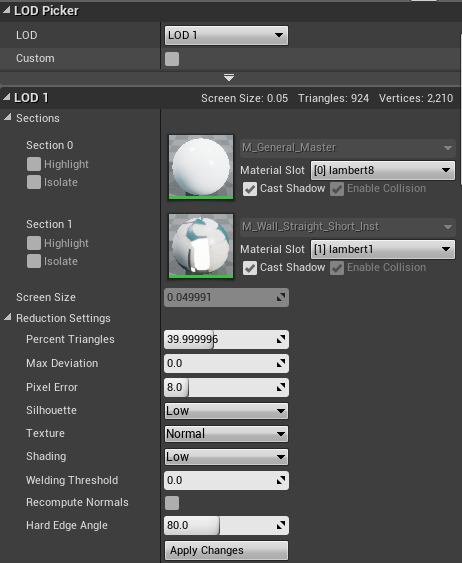
LOD1 at 40% triangles, full texture, degraded shading & silhouette.
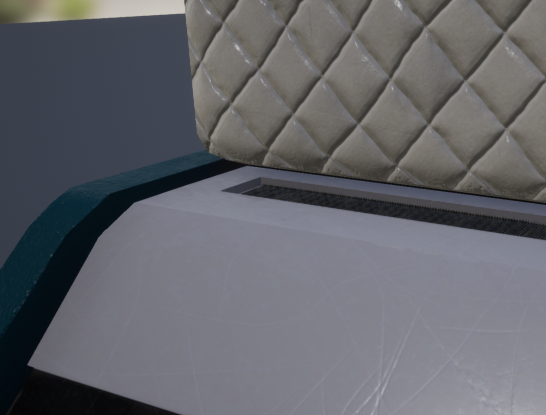
LOD2 at 25%, degraded texture, silhouette and shading.
Comparison between my LOD0 and LOD2. Triangles lowered from 2444 to 578. Curves at distance at replaced with hard angles, indents are flattened, texture is lowered, etc.
In many cases, I used LOD0, LOD1, LOD2 and LOD3. Not all assets required that many levels, especially low poly assets.
Since some meshes can lower triangles without visual artifacts, I got away with lowering some asset’s LOD0 far lower than 100% triangles.
Some of the assets I had, especially foliage, I got LOD0 down to 40% triangles without noticeable artifacts.
The end result allowed me to cut triangles from 9 million to 4 million at any given time.
Building LODs significantly decreased my triangle count, but it was not enough. This is where Hierarchical LODs (HLODs) come in. HLODs allow us to replace connected assets with a single asset that culls many more triangles.
HLOD Reference -
https://docs.unrealengine.com/en-us/Engine/HLOD
There’s a number of limitations for HLODs such as not using it for meshes that need opacity or masks. HLODs generate a material for the new single mesh, so it cannot do translucent or masked materials in the same opaque material.
For my meshes with translucent materials, I had to select the meshes in world and disable including them in HLOD.
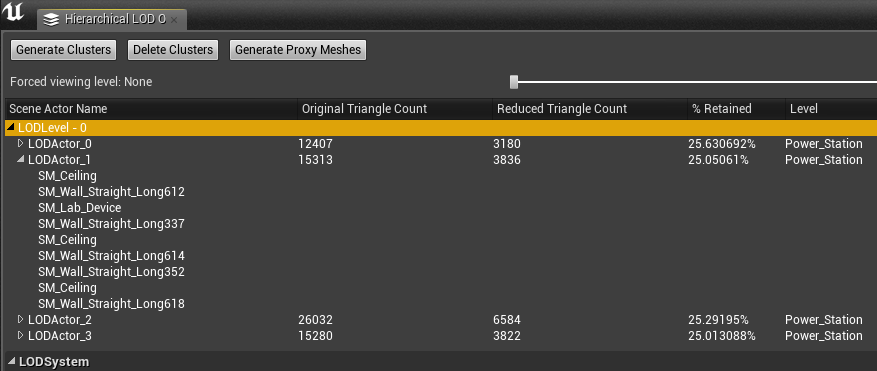
HLODs can be generated through Unreal’s Hierarchical LOD Outliner (window -> Hierarchical LOD Outliner).
Generating clusters will search the world for assets that can be combined and create clusters. Any cluster can be expanded to see which meshes are included. Right clicking a mesh allows it to be dropped from the cluster if you don’t want it included.
Once clusters are generated, I generated the proxy meshes (the combined meshes, textures and materials). That takes a long time to generate, but can reduce triangles significantly.
After the proxy meshes were generated, I flew around the map to look for artifacts at distance. At some distance, it certainly did show on some meshes, but most were fine. I had to delete and modify only a couple.
Overall this saved me close to a half-million triangles, in theory.
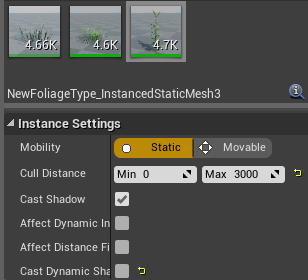
Even with the decreased foliage LODs, foliage was still proving to be a problem. With ‘ stat RHI ’ running, any time the player looked at foliage, the number of triangles jumped by a million.
I wasn’t culling foliage (seems not to cull on default). I went into the foliage settings for each mesh and set the max distance before the foliage was culled. I also disabled dynamic shadows on all of the foliage. Capsule shadows and static shadows still looked good enough that I didn't need dynamic shadows.
These changes reduced triangle count dramatically. Looking at grass now only increased triangle count by about half a million.
In retrospect, I would have used different foliage assets. The ones I had were very nice, but incredibly high poly for what I needed. I needed and should have used relatively low poly foliage.
Initially I turned off all shadows on the foliage, but it did not look good. I was trying to cut on shadows where possible for increased performance.
By accident, I ended up with a really nice compromise. I turned on static shadows on some foliage assets and turned it off on others. With about 50% of the foliage having static shadows and 50% not, you really couldn’t tell. I guess there was enough overlap on shadows that the end result looked nearly identical.
This allowed me to cut another hundred thousand triangles (though probably only because I was using high poly foliage when I shouldn’t have been).
Though LODS and HLODS helped significantly, the level was just too big to be in memory at any given time. Texture streaming was taking too much memory and Unreal was giving warnings. The level needed to be broken up.
Thankfully UE4 provides tools for this as well.
Reference -
https://docs.unrealengine.com/en-us/Engine/LevelStreaming
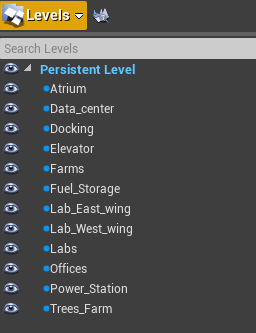
The level outliner can be opened through window -> Levels.
To create a separate level, you can select a bunch of assets carefully, go to the levels dropdown and choose “create new with selected actors”.
An easy way to migrate assets across levels is to hide the visibility in the level outliner. That will hide what’s in the sublevel and allow you to select actors to add to the sublevel. Once others are selected, you can switch visibility back, right click the level in the outliner and choose “move actors to level”. The level has to be visible in order to move actors to it.
Once the sublevel is created, you have to right click the persistent level and choose “make current” just to make sure you’re working in the main level.
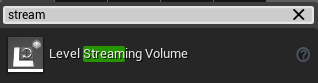
Then add a streaming volume around the sublevel. You have to be generous because if the player camera goes outside the streaming volume, the sublevel will despawn. You want to make sure the volume is large enough to contain anywhere the player camera could be (down to the floors and up to the ceilings).
You also want the streaming volume to be large enough that the area can load in without a loading time. When the player camera enters the volume, the sublevel actors will be loaded in. That means we have to account for the player moving at max speed into the volume while giving the engine time to seamlessly load in all the actors.
If the distance from the volume to the actors is too short, then the player will see the actors loading in and the game will lag up significantly during a load time.
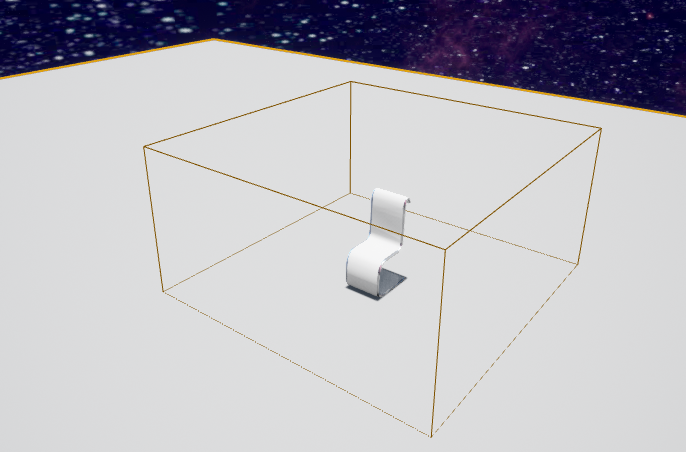
If the distance is far enough away, the player will not see the actors loading in or feel any lag from assets being loaded in. It’s a balancing act though because if the volume is too large, we get back to the problem that caused us to need streaming to begin with - too much loaded in at any given time.
In this example, the chair would not be loaded in until the player is within the cube volume.
There’s a few tricks to this -
For example, my lab sublevel has six triggers that will cause it to load or unload. If the player enters any of them, the sublevel will load in. If the player leaves all of the them, the sublevel will unload.
Streaming volumes need to be assigned manually to each level or levels. Again, each level can have multiple trigger volumes and each volume can be assigned to multiple levels.
You can also choose if the sublevel is initially loaded or visible.
After the volumes are assigned, you should test the level to make sure it loads early enough the player cannot see assets load in or experiences lag.
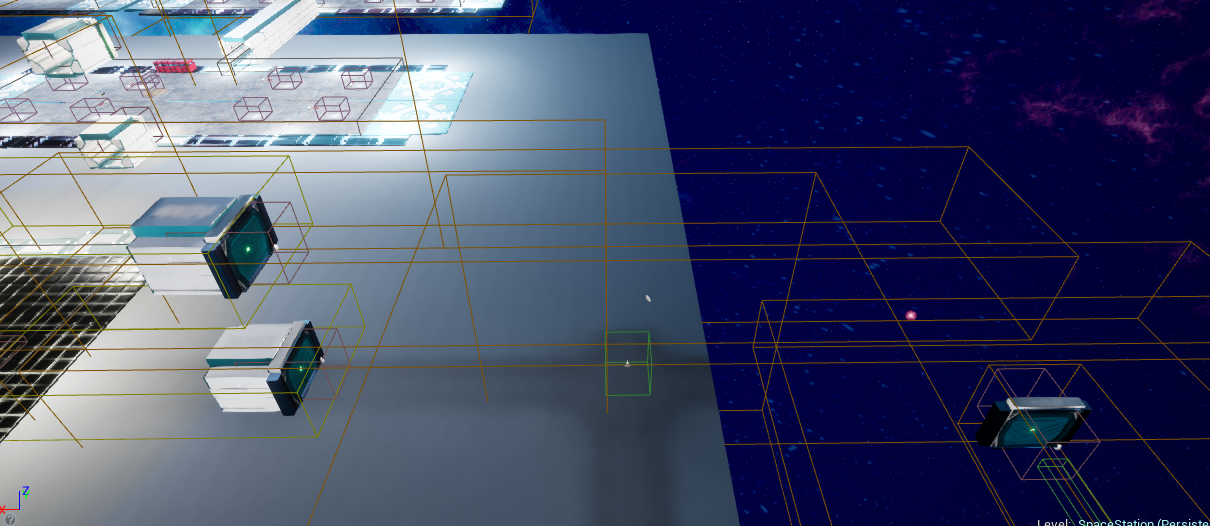
This is a visual of the outlines of several of my overlapping streaming volumes. This accounts for any hallway that the user could enter the room through on two different floors. There’s a main volume and four volumes that account for entrances with enough space for loading time.
It’s important to note, that you can do this without streaming volumes as well. Sublevels can be loaded or unloaded from blueprint as well. There may be times where you want a custom trigger or event to load in a certain sublevel. This can even be used to switch out sublevels after a certain gameplay event has occurred.
With level streaming (in addition to my other performance tweaks), the number of triangles drawn at any given time dropped significantly and the framerate increased dramatically.
After working with level streaming, it’s clear that this should have been done much earlier on and should be included in my future dev process. It’s very easy to do in Unreal and significantly increases performance.
Unreal has some great optimization view modes for helping with lighting, materials and LOD optimization.
View Mode References -
https://docs.unrealengine.com/en-us/Engine/UI/LevelEditor/Viewports/ViewModes
Light Complexity Reference -
https://docs.unrealengine.com/en-us/Engine/UI/LevelEditor/Viewports/ViewModes#lightcomplexity
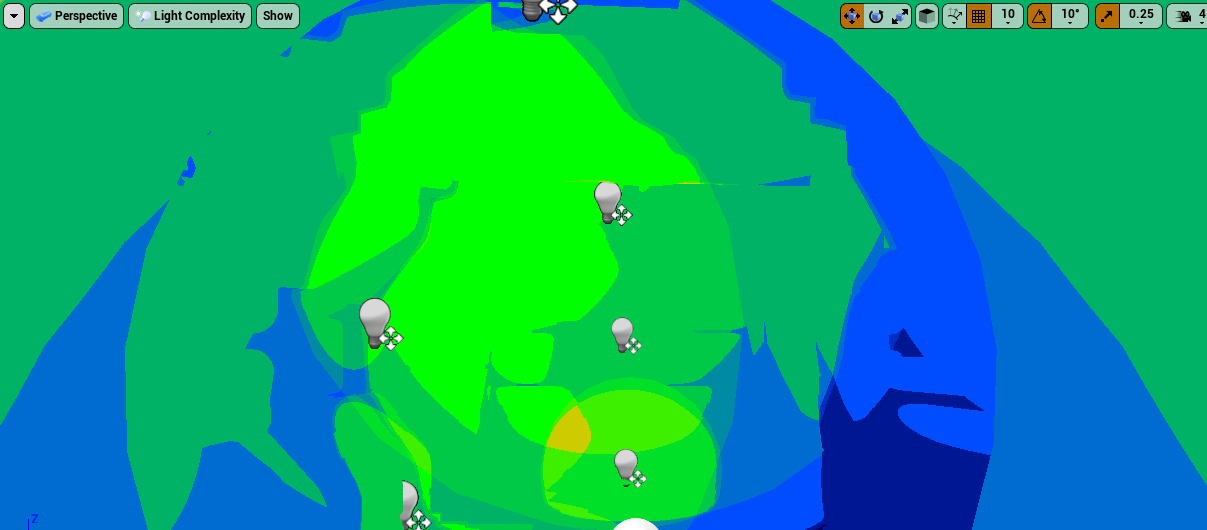
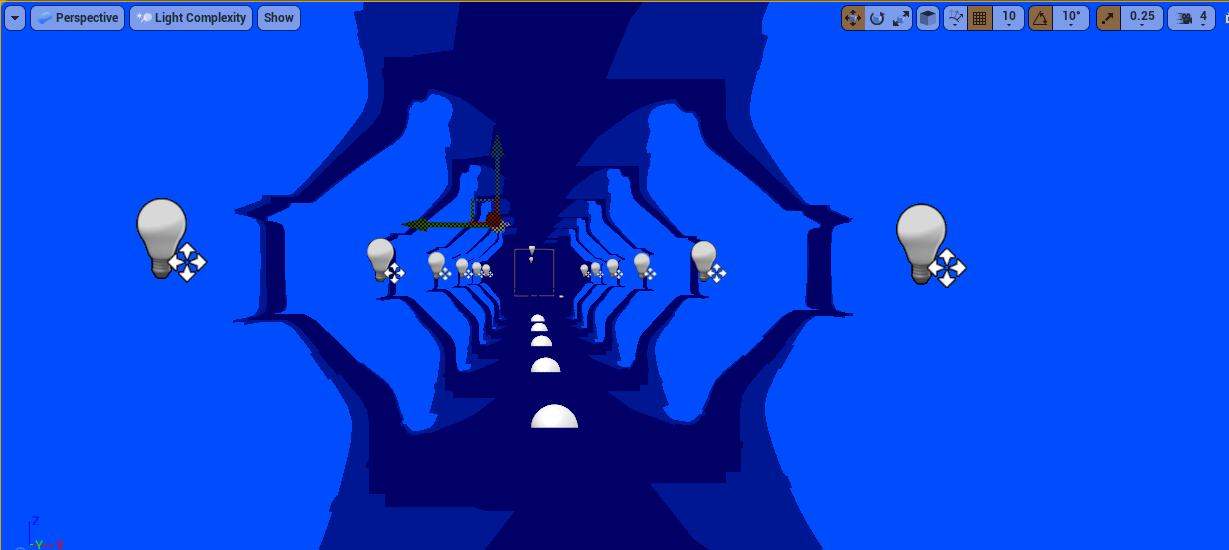
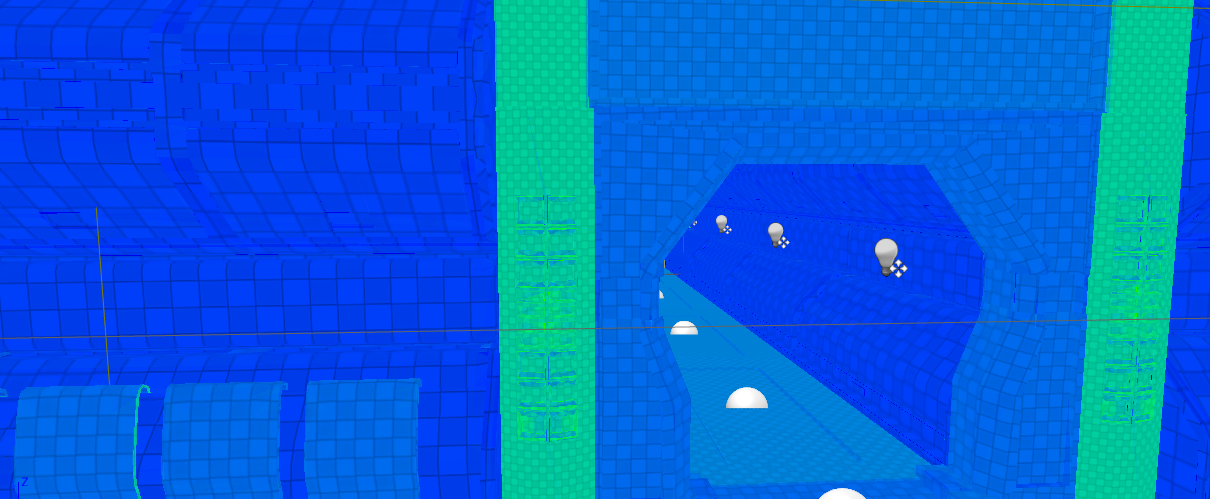
The light complexity viewmode shows how expensive areas are in terms of non-static lights. Areas in red or other yellows/oranges are problematic because of overlapping light sources that need to be drawn. The cooler the color the better for performance.
Less optimal light but still fairly good (more overlapping light). The yellow region is starting to become more expensive.
Optimal lighting. Bright enough without any overlapping light sources.
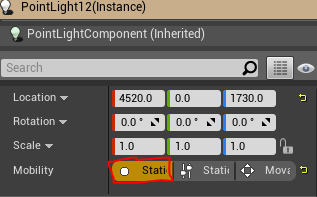
Initially my lighting had a number of red areas that would cause FPS to drop. One quick change was to switch all permanent lights to static since they are the cheapest. I also disabled most dynamic shadows, instead opting for capsule shadows on the player character.
Light mobility set to static
My demo has very few movable or dynamic lights on purpose. Initially many of the lights in world were overlapping and set to moveable so it was taking a lot of extra processing.
Using the light complexity view mode I was able to fly through each room optimizing the lighting (moving lights, changing size, changing mobility, changing intensity, etc).
The lightmap density view mode shows the density of lighting per texture to show how even your lighting will be. Again, cooler colors are better. Brighter colors are more intensive and will also lead to uneven lighting.
Lightmap Density Reference -
https://docs.unrealengine.com/en-us/Engine/UI/LevelEditor/Viewports/ViewModes#lightmapdensity
Lightmap Density View
The shader complexity and quads views show how expensive materials are to draw. Mostly this comes down to number of instructions and lookups in the shader.
Shader Complexity Reference (does not include quads view) -
https://docs.unrealengine.com/en-us/Engine/UI/LevelEditor/Viewports/ViewModes#shadercomplexity
Green is good. Red is bad. Pink is very bad and white is extremely bad.
The ‘vs’ shown on the bottom bar is how expensive the vertex shader is at the point of the cursor. The ‘ps’ is how expensive the pixel shader is at the point of the cursor.
This can give you an indication how expensive each material is and how well your meshes are performing.
Decreasing the triangle count in my LOD meshes significantly helped with performance here, but the most significant part was the materials. Some of the materials I had were just far too expensive. They had a lot of shader instructions, translucence, layers, etc.
To increase performance, I ended up needing to switch out materials or make custom materials that performed better. In many cases, I duplicated the original material and started removing instructions while trying to maintain quality. In other cases, I just switched the material with a similar one. Then in a few cases, I wrote new materials from scratch to replace ones that I couldn’t get to perform well.
For any material, you can see the shader instruction count in the viewer to get an idea of how expensive it is.
Based on Epic’s GDC talk on Robo Recall optimization, I realized I could be more clever with tick rates. I already knew to avoid running everything on event tick because that runs each frame. Every actor that handles code on event tick has to calculate each frame. Actors running event tick calculations can add up and start impacting performance.
It turns out a lot (if not most) things do not need to run every tick. Some things certainly do, but other things may only need to be checked once and a while.
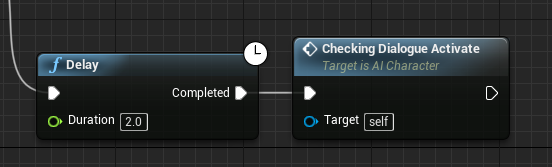
This is an example of a check I make on the AI every two seconds. As long as this check is performed within two seconds, the player cannot notice the difference. This significantly dropped the amount of AI code that needs to run on each tick.
For things that don’t need to run all the time, you can fully disable the tick until the player gets near or certain events occur.
For example, this actor only sets tick when a certain component is overlapped and stops ticking when the component is not longer overlapped. This is also a slow ticking actor set to only every 0.5 seconds. The custom tick interval is only necessary if you want to slow down how often this actor ticks for performance reasons.
’
Though the example is simplified, I took the core idea from Epic’s GDC talk on Robo Recall optimization.
With all of my performance tweaks, the number of triangles drawn at any given time hovers between 200k and 300k, well below my 1 million budget. Looking at foliage still causes a spike to a million because I’m not using the correct foliage assets for this level. That said, the triangle count dropped from 9 million to an average of 300k with little visual artifacts.
My FPS on an older (2012) 660m GTX mobile GPU stays above 90 on max settings.
Epic provides some great tips on optimization, such as LODs can be based on platform. Fortnite’s mobile version is set to run LOD1 as the minimum LOD instead of LOD0 (as per their Optimizing UE4 for Fortnite talks).
Reference -
https://docs.unrealengine.com/en-us/Programming/Development/BuildConfigurations
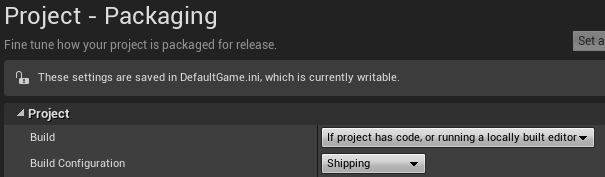
Build configuration is switched to shipping for optimization
Game Icons
I also switched out the desktop icons and splash screen using information from this question.
https://answers.unrealengine.com/questions/18221/packed-game.html?sort=oldest
Icons are switched under “Platforms” in the settings and the appropriate OS.
For the editor splash (for developers) or the game splash, it takes a 600x200 png.
The game icon (shown in the taskbar and other places) is specific to each platform. For Windows, it takes a multi-size ico file packaged for 256x256, 128x128, 64x64, 32x32 & 16x16. The link above discusses an easy way to do this through http://icoconvert.com .
One issue I ran into was HLODs failing to build in shipping configuration. This is because some of the HLODs generated had a bug that generated 0 triangles and could not build.
View of the HLOD manager
When the build failed, I had to go through all of the HLOD clusters and find ones where the reduced triangle count was 0. Those had to be modified and regenerated. In some cases, it meant removing certain meshes from the cluster and rebuilding the proxy meshes. Other times, I just had to go through and delete clusters with 0 triangles as well as the clusters near them. Then regenerate the clusters and proxy meshes.
This seems to be a bug that sometimes happens, but once that was corrected, the build was fine.